
Developers Guide: Building & Launching Your First Chrome Extension
Beginner friendly guide to creating a chrome extension. This post covers everything from creating your manifest.json file to submitting your extension to the chrome store.
Welcome to my guide
Hey there! I’m Mike Sallese, creator of the chrome extensions Google Meet Transcripts, by Scribbl and Uno Password Generator , by Uno .
I find chrome extensions to be one of the easiest & most rewarding products you can build as a developer. I’ve come up with a basic structure for building chrome extensions that keeps things super simple and beginner friendly, while creating a foundation for an extension that can support thousands of users. In this guide I’ll walk you through every detail of creating a chrome extension, from creating your manifest.json file to submitting your extension to the chrome store.
Table of Contents
Preface: How chrome extensions work
Step 1: Create your manifest.json file
Step 2: Load your extension into Google Chrome
Step 4: Recipes: Get rid of all the junk!
Step 5: Add a button on the popup to do the cleanup
Step 6: Chrome store submission!
Preface: How chrome extensions work
Chrome extensions are not too complicated, but having an understanding of how the pieces work together can really help. For most extensions, the only files you need to understand are the:
- Background Script (
background.js) - Popup Script (
popup.js) - Popup HTML (
popup.html) - Content Script (
contentscript.js)
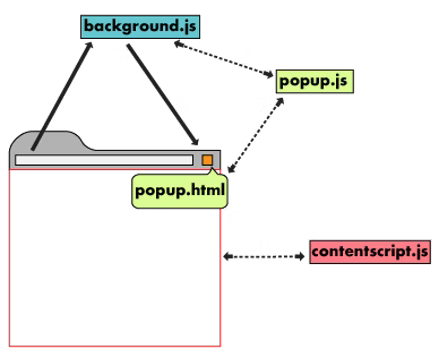
The above diagram 👆 does a great job a showing how the files I mentioned above work together. Here’s an explanation of what each file does:
Content Script:
The content script is an extremely powerful tool for giving your chrome extension access to the page a user is currently on. Content scripts have (pretty much) full access to the page that the they are is running on. For example: If your content script is running on google.com, your script could find the search input, fill it out with a search term, and click the search button. Pretty cool right?
A few more important details about content scripts:
- The content script loads when a user goes to a site that script has access to
- The content script goes away when a user leaves that site. For operations that need to run longer than a page may exist in a user’s browser, we use the background script.
NOTE: For security purposes, chrome extensions have to request access to the pages they’d like to be able to run on. This is controlled via host_permissions. More on host permissions
here
, or keep reading the guide and we’ll cover them again in the
Requesting access to recipe page
section.
Popup Script & Popup HTML
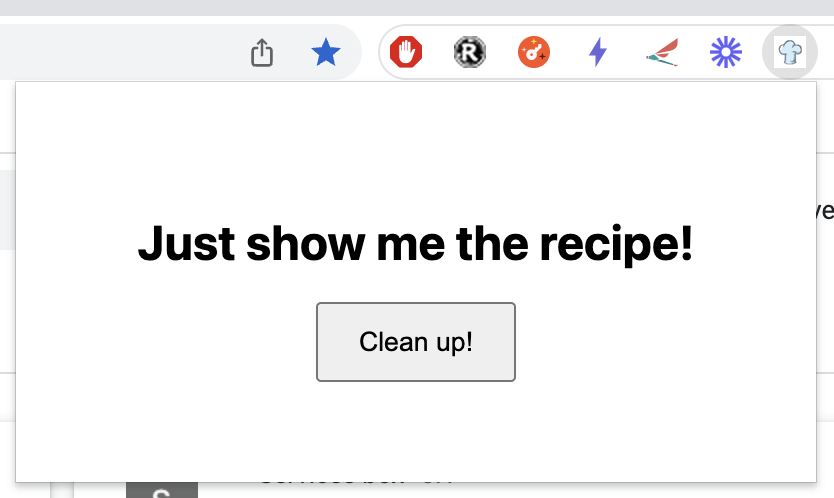
We have two files for the extension’s “popup”. The extension’s popup is the the view you get when you click on it’s icon. Here’s a popup as an example:
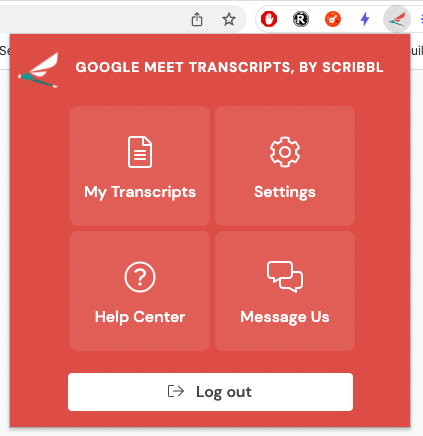
popup.html is the html file that controls what the popup looks like, and popup.js gives you the ability to write some logic for the view.
Background Script:
The background script is an essential piece of your chrome extension. Background scripts are used for running code that may need exist longer than a content script or popup script can stay alive. To best illustrate their usage, here’s an example:
Let’s say you want to build a chrome extension that saves all images from a facebook to google drive. When the user goes to facebook, your content script will fire. Your content script can find all the images, and send them to google drive. The problem with this is when a user leaves facebook, if the images haven’t finished uploading to google drive then they won’t be uploaded. This is because the content script is killed once the user leaves facebook. Enter the background script. What you should do, is find all the images in your content script and send them to your background script to be uploaded. When a user leaves facebook, your background script will continue uploading the images until it is finished.
Communicating between scripts
Google’s documentation does a great job at explaining how to communicate between scripts. The gist of message passing looks like this:
Sending a message
chrome.runtime.sendMessage({greeting: "hello"}, function(response) {
  console.log(response.farewell);
});
Receiving a message
chrome.runtime.onMessage.addListener(
  function(request, sender, sendResponse) {
    console.log(sender.tab ?
                "from a content script:" + sender.tab.url :
                "from the extension");
    if (request.greeting === "hello")
      sendResponse({farewell: "goodbye"});
  }
);
Onwards!
If you understand the basics we just covered, you’re in great shape to build your first chrome extension. In the next section we’ll cover the first step to getting started, creating your manifest.json file.
Let’s build a chrome extension
The best way to learn how to build a chrome extension is to well… Build one! The following steps will walk you all the way through creating a chrome extension and submitting it to the chrome store.
What are we building?
I want to build something real, to ensure we cover everything required to build a real chrome extension. I’ve had an idea for another extension for a while, and I figured this is a great time to build it. Have you ever been on a website for a cooking recipe and been bombarded with ads, life stories, and oodles of stuff you don’t need to get the actually recipe? I find it quite annoying.
The chrome extension we will build will strip a recipe website down to just what’s essential: The recipe. We’ll call it: “Just show me the recipe”.
I’ll share all of the source code that goes into building this extension: https://github.com/msallese31/just-show-me-the-recipe
Step 1: Create your manifest.json file
Okay, let’s get started. First we’ll need a manifest.json file. I recommend creating a new git repository to track / backup your work, but all you really need is an empty directory.
Create your manifest.json file
touch manifest.json
And enter the following contents:
{
  "name": "Just show me the recipe",
  "version": "0.1",
  "description": "No backstory, ads, etc.  Just show me the recipe.",
  "icons": {
    "16": "images/16x16.png",
    "48": "images/48x48.png",
    "128": "images/128x128.png"
  },
  "manifest_version": 3
}
The manifest file is describing our extension. We gave it a name, version, description, icons, and specified that we’d like to use manifest version 3.
Icons
Chrome extensions have specific file sizes for the icon you provide. I went and grabbed a free logo from https://www.vecteezy.com/vector-art/5413180-chef-hat-cartoon-vector-design and then uploaded that logo to https://hotpot.ai/icon-resizer to resize it to the proper sizes. When using the resizer, select “Chrome” as the option. This will get you the proper file sizes.
If you’re following along and just want to grab the icon images, you can get them from the github repo for this post: https://github.com/msallese31/just-show-me-the-recipe
Step 2: Load your extension into Google Chrome
To develop our extension, we’ll need to be able to run it. Follow the following steps to get your extension running in your chrome browser:
- Go to chrome://extensions/
- Turn on “Developer Mode”
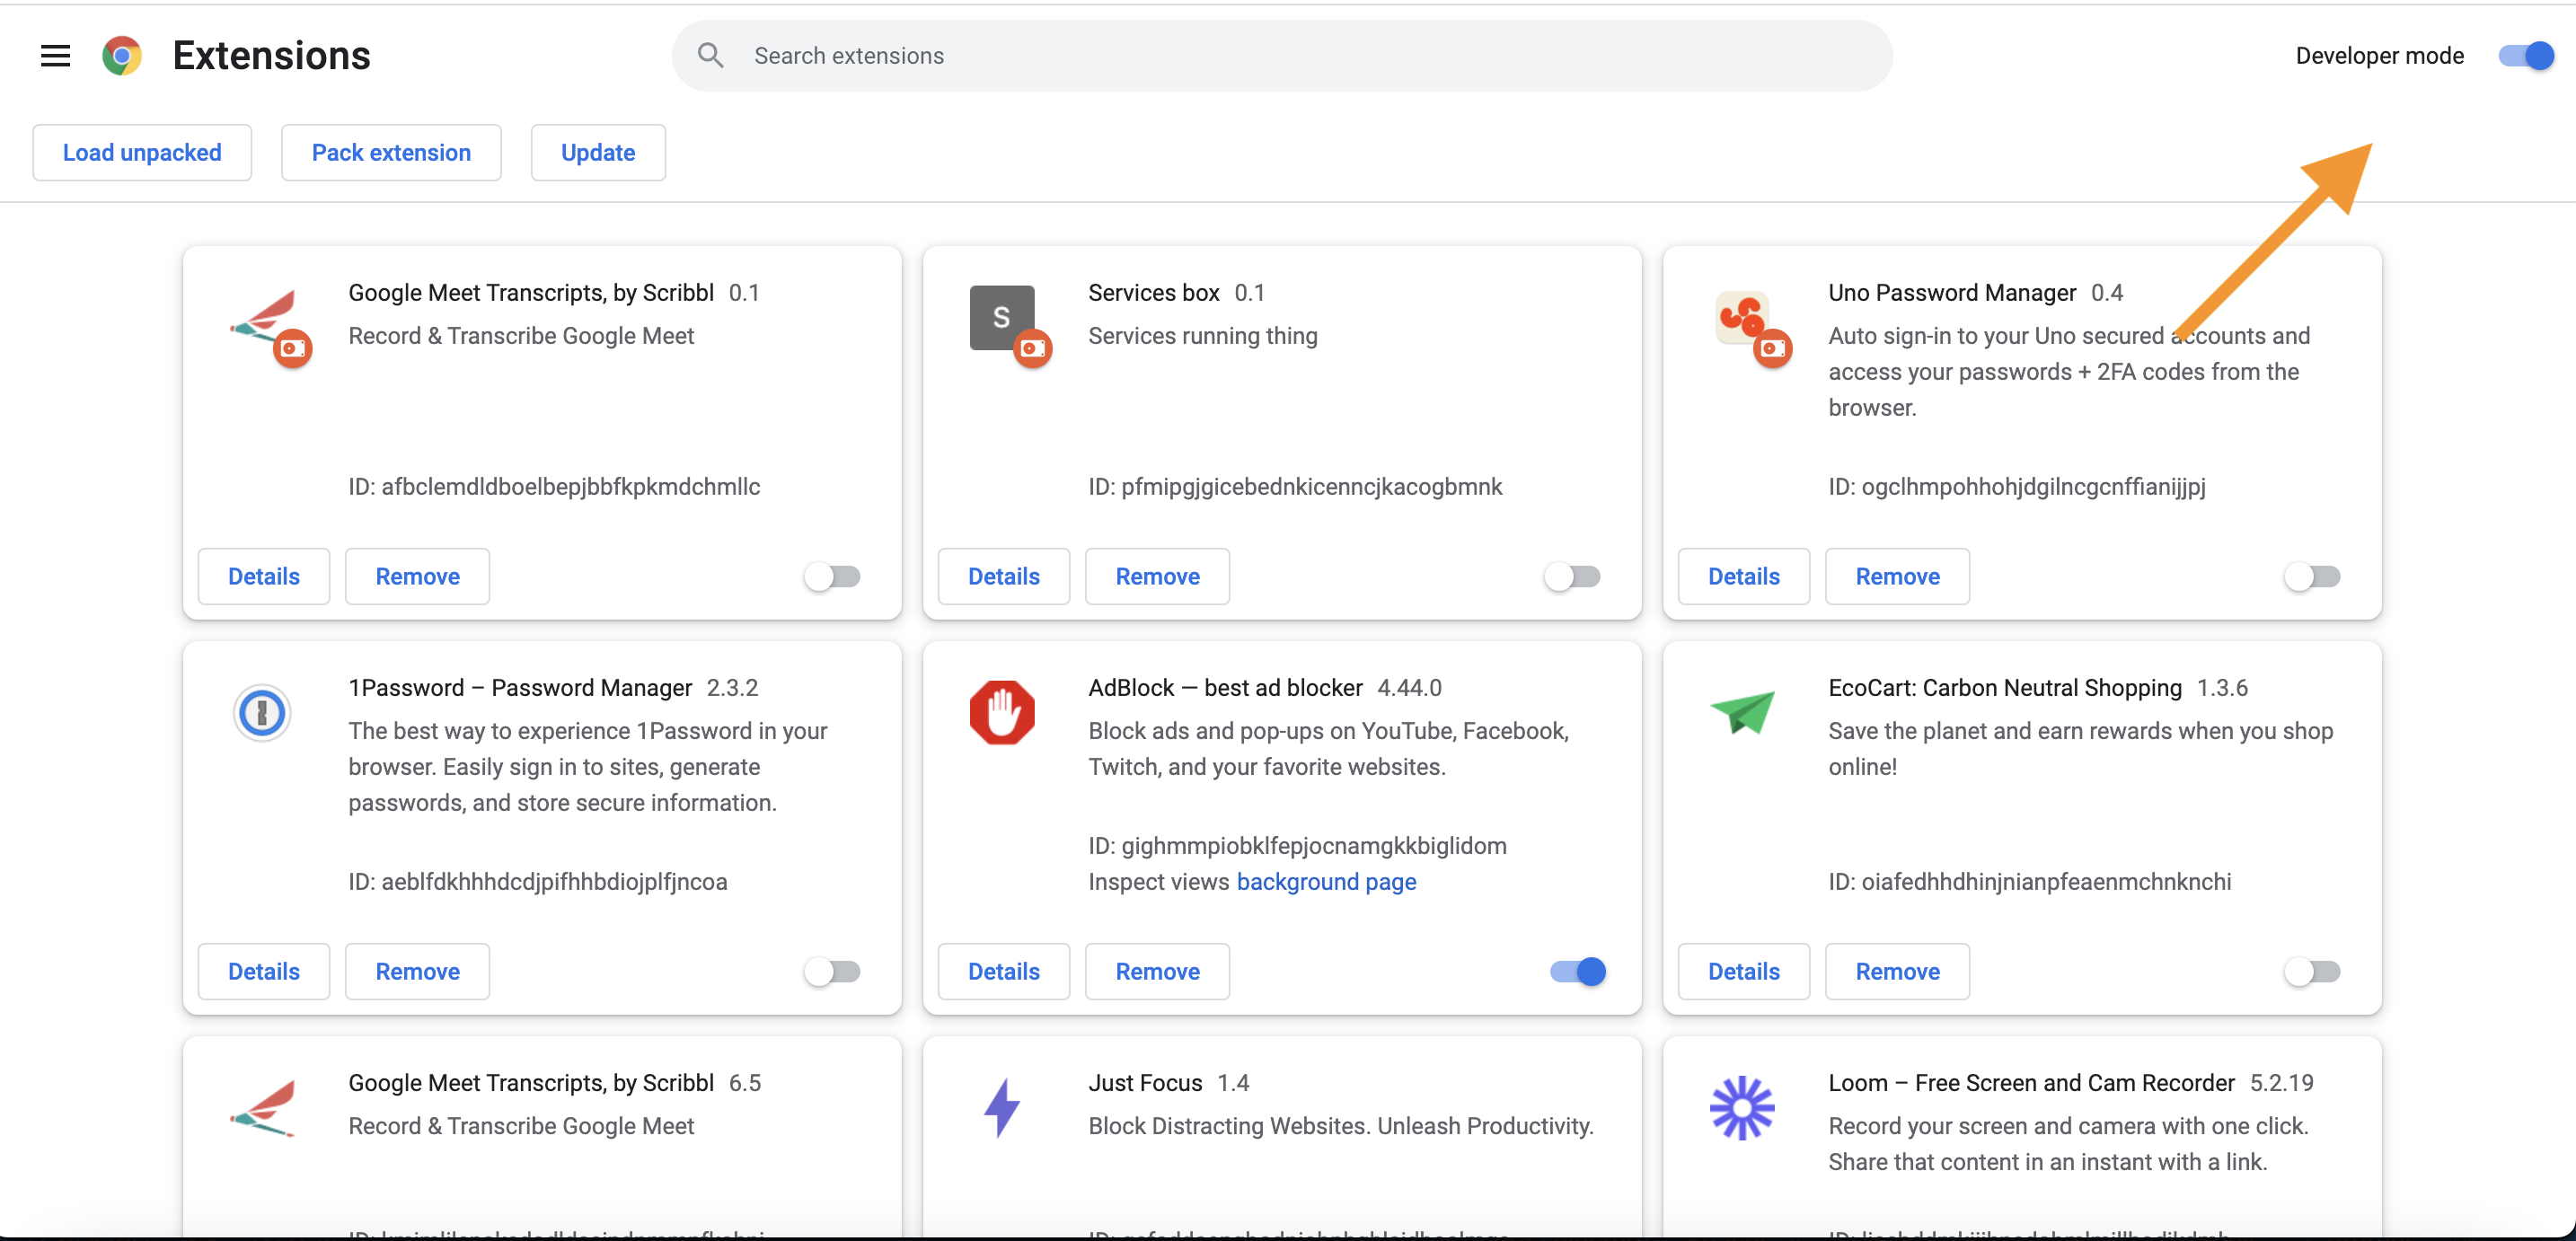
- Click “Load unpacked”
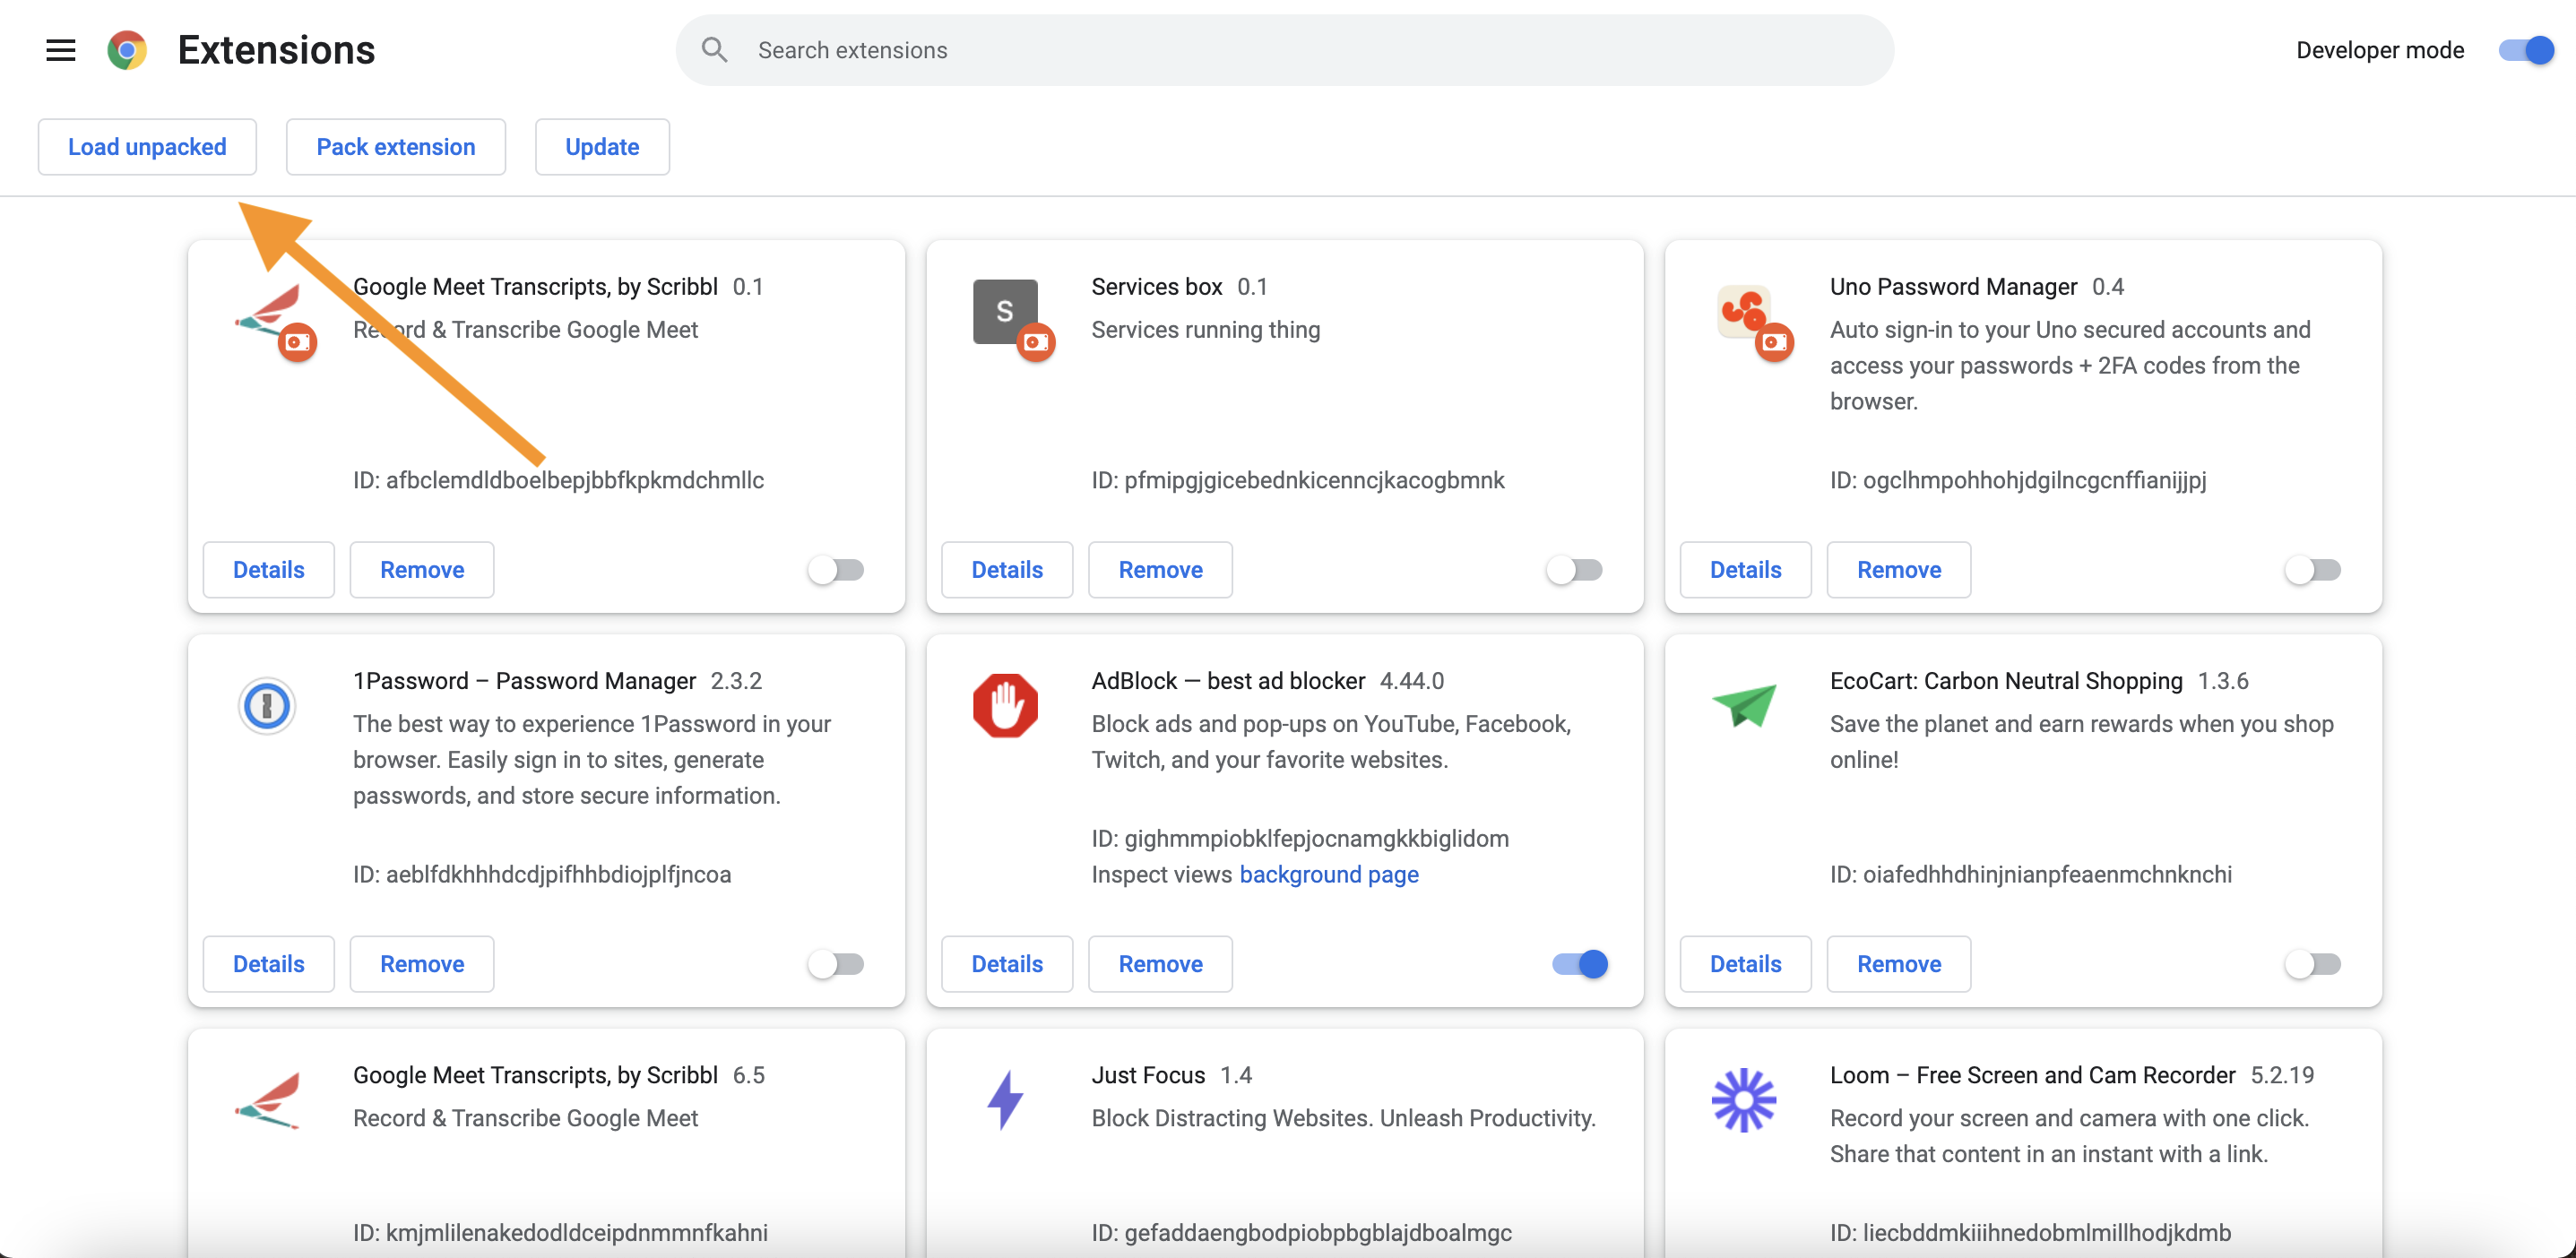
- Select the directory that contains your
manifest.jsonfile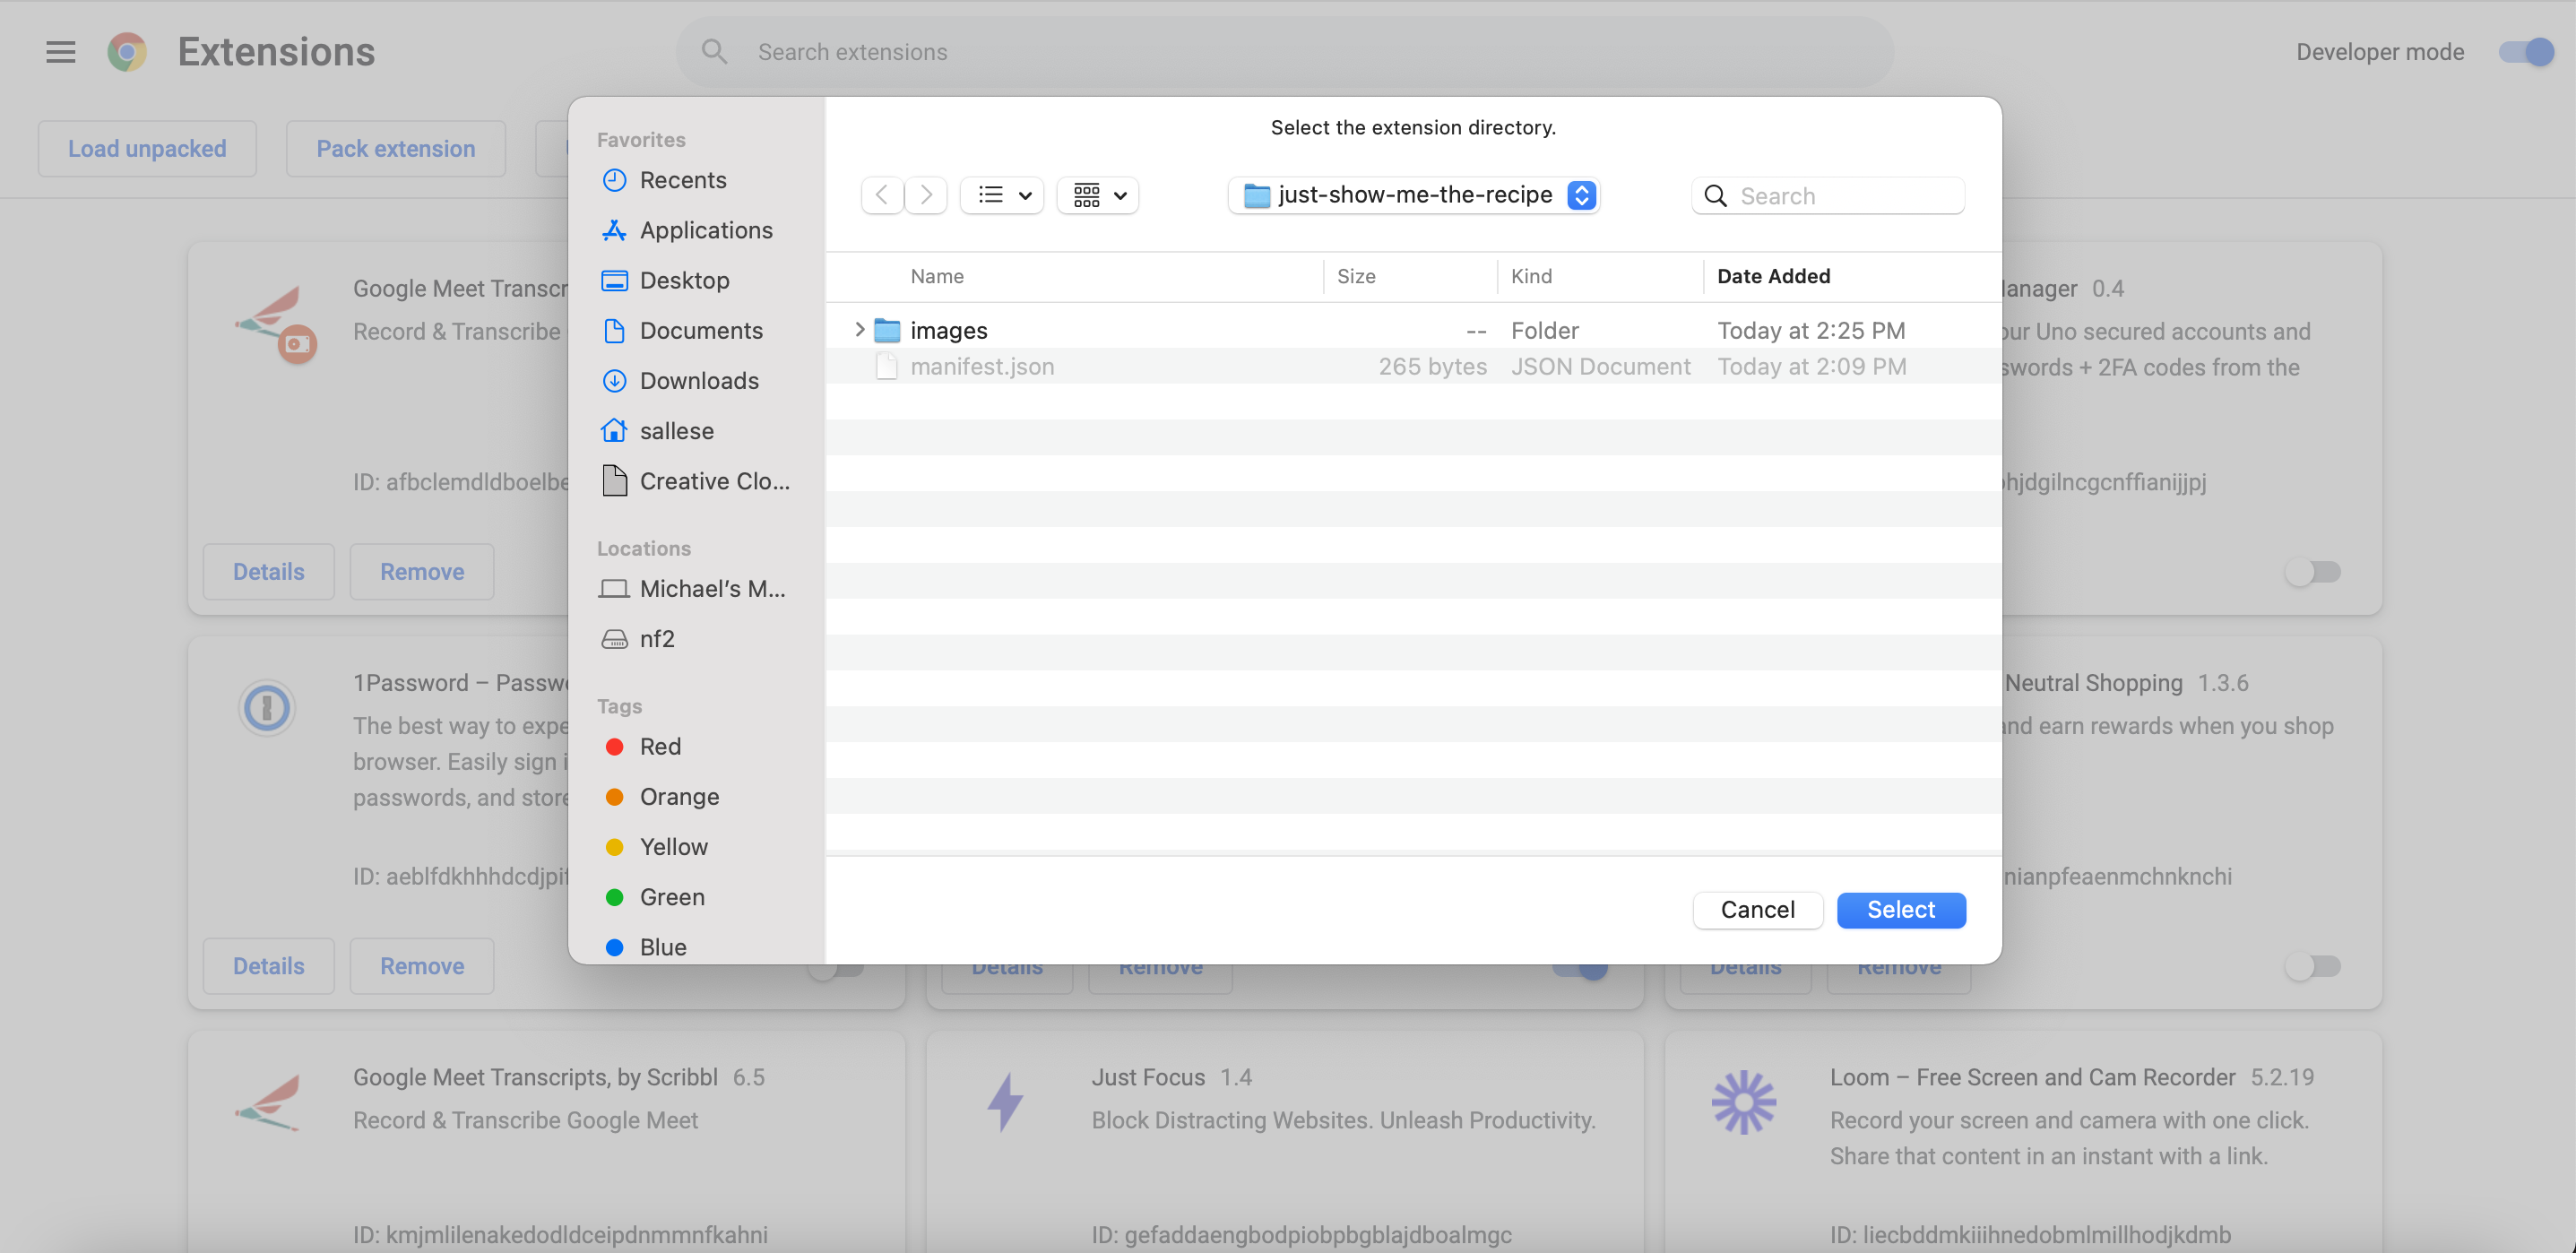
You should now see the extension amongst your other chrome extensions. Whenever you update any code for the chrome extension, you have to click the refresh button to make your changes live locally:

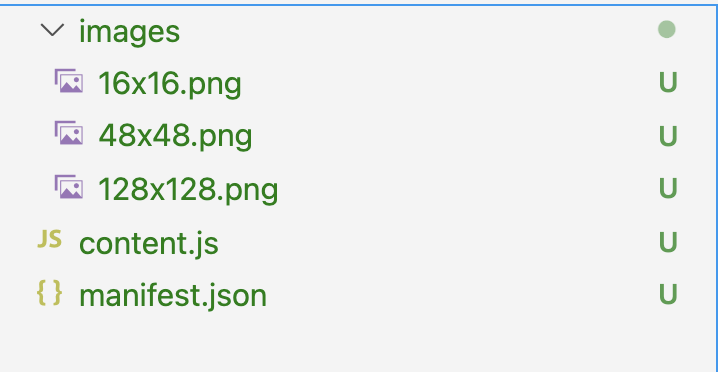
Step 3: Add a content script
Create the file
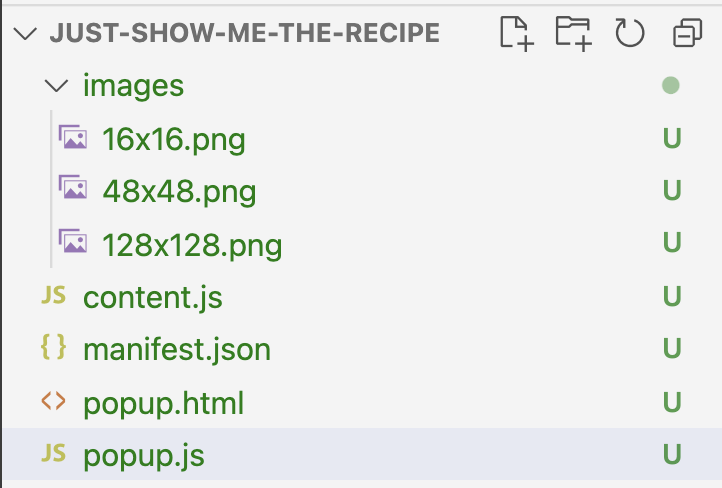
Create a file in the root directory called content.js. Your directory structure should look like this now:
Request access to recipe page
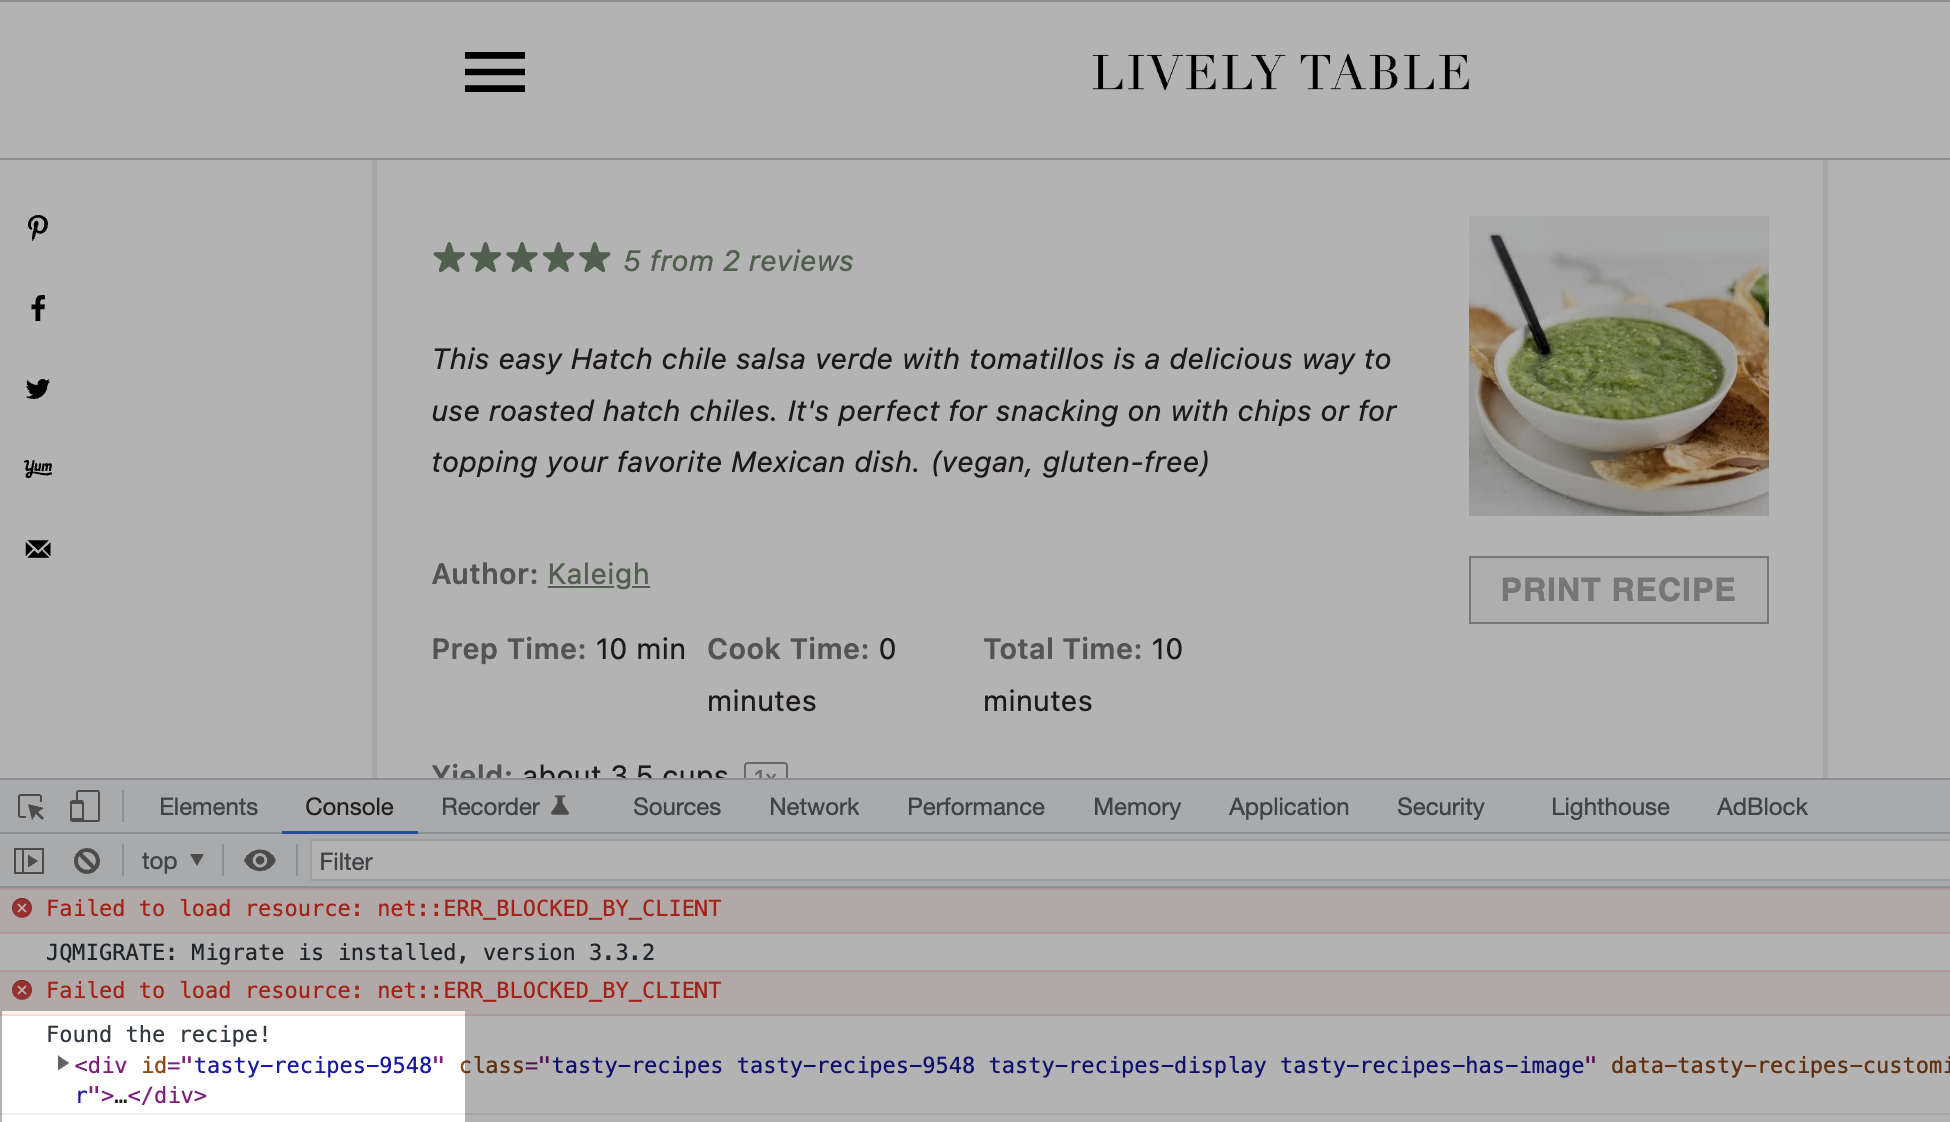
To be able to clean up a recipe page to be more simple, our chrome extension will need access to the page the recipe is on. Let’s start with this recipe page: https://livelytable.com/hatch-chile-salsa-verde/
Our content script will need access to livelytable.com. Add this to your manifest.json file:
  "content_scripts": [
    {
      "matches": ["https://livelytable.com/*"],
      "js": ["content.js"]
    }
]
This should give the extension the ability to run on any page on livelytable.com.
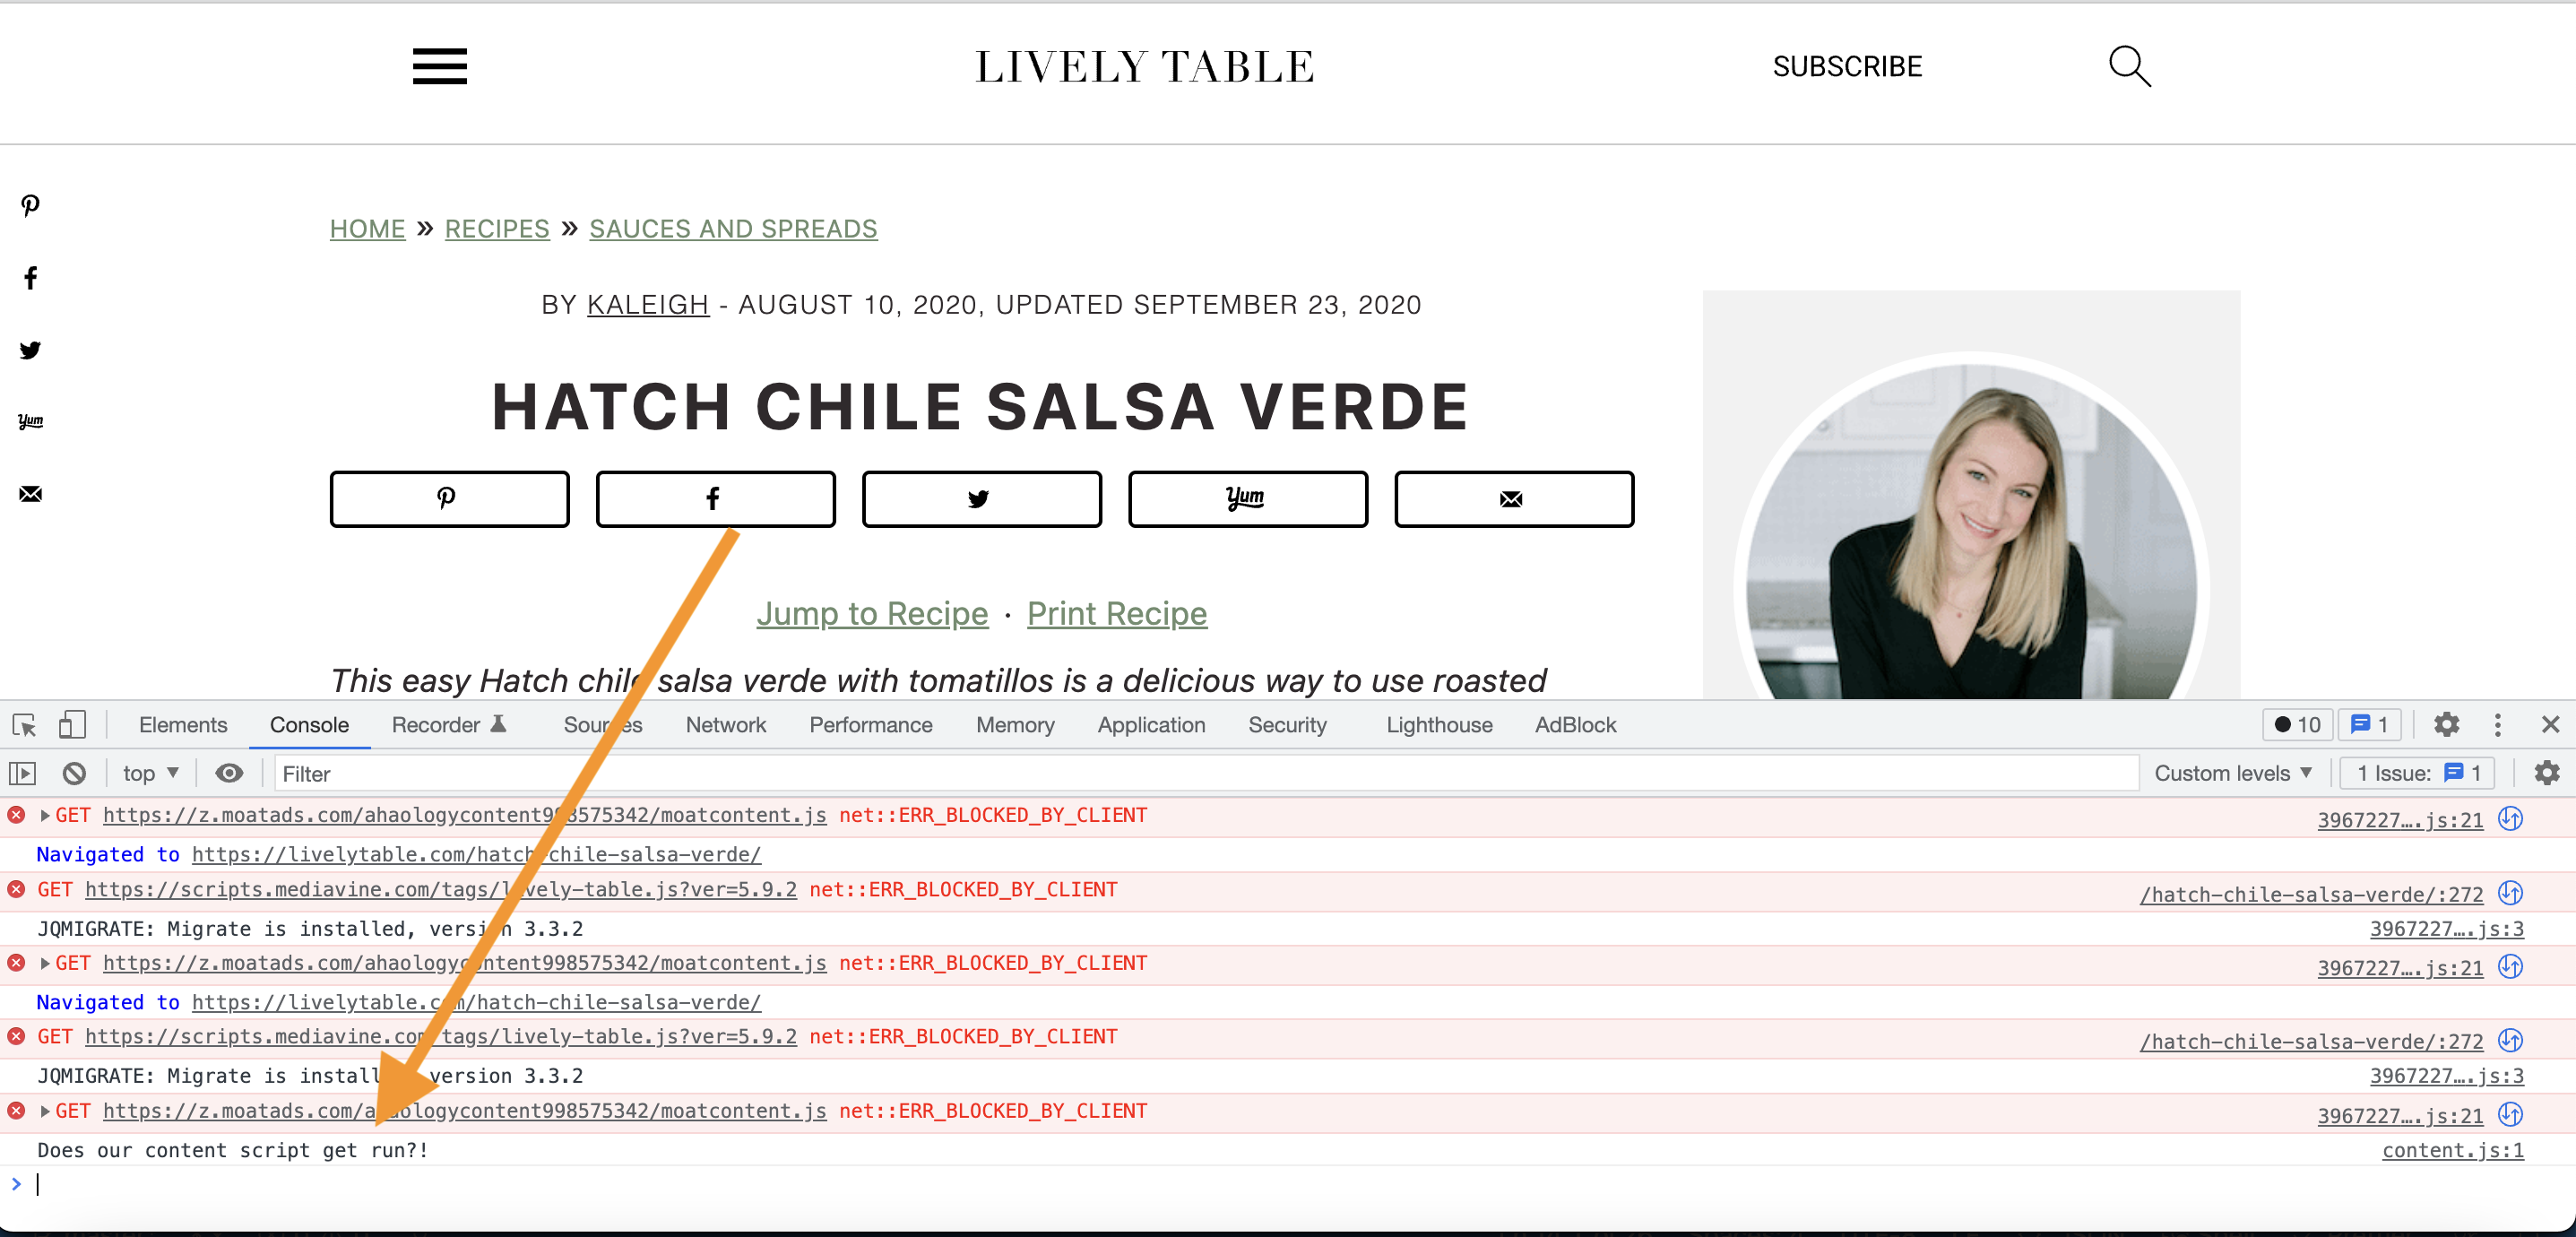
Test it out!
Let’s see if we can get some code to run when we go to our recipe page. In content.js, let’s just add a simple print statement:
console.log("Does our content script get run?!");
Reload the extension and go to https://livelytable.com/hatch-chile-salsa-verde/. If you open up chrome dev tools and go to the console, you should see our print statement. Success!
Step 4: Recipes: Get rid of all the junk!
Okay now let’s have a little bit of fun. Let’s get rid of everything but the actual recipe itself.
Inspect the structure of the page
To be able to reliably hide extra stuff on livelytable.com, we need to understand how their website is built a little bit. After inspecting the document, I noticed that the div that actually has the recipe in it, always has an id that looks like this: tasty-recipes-[NUMBER].
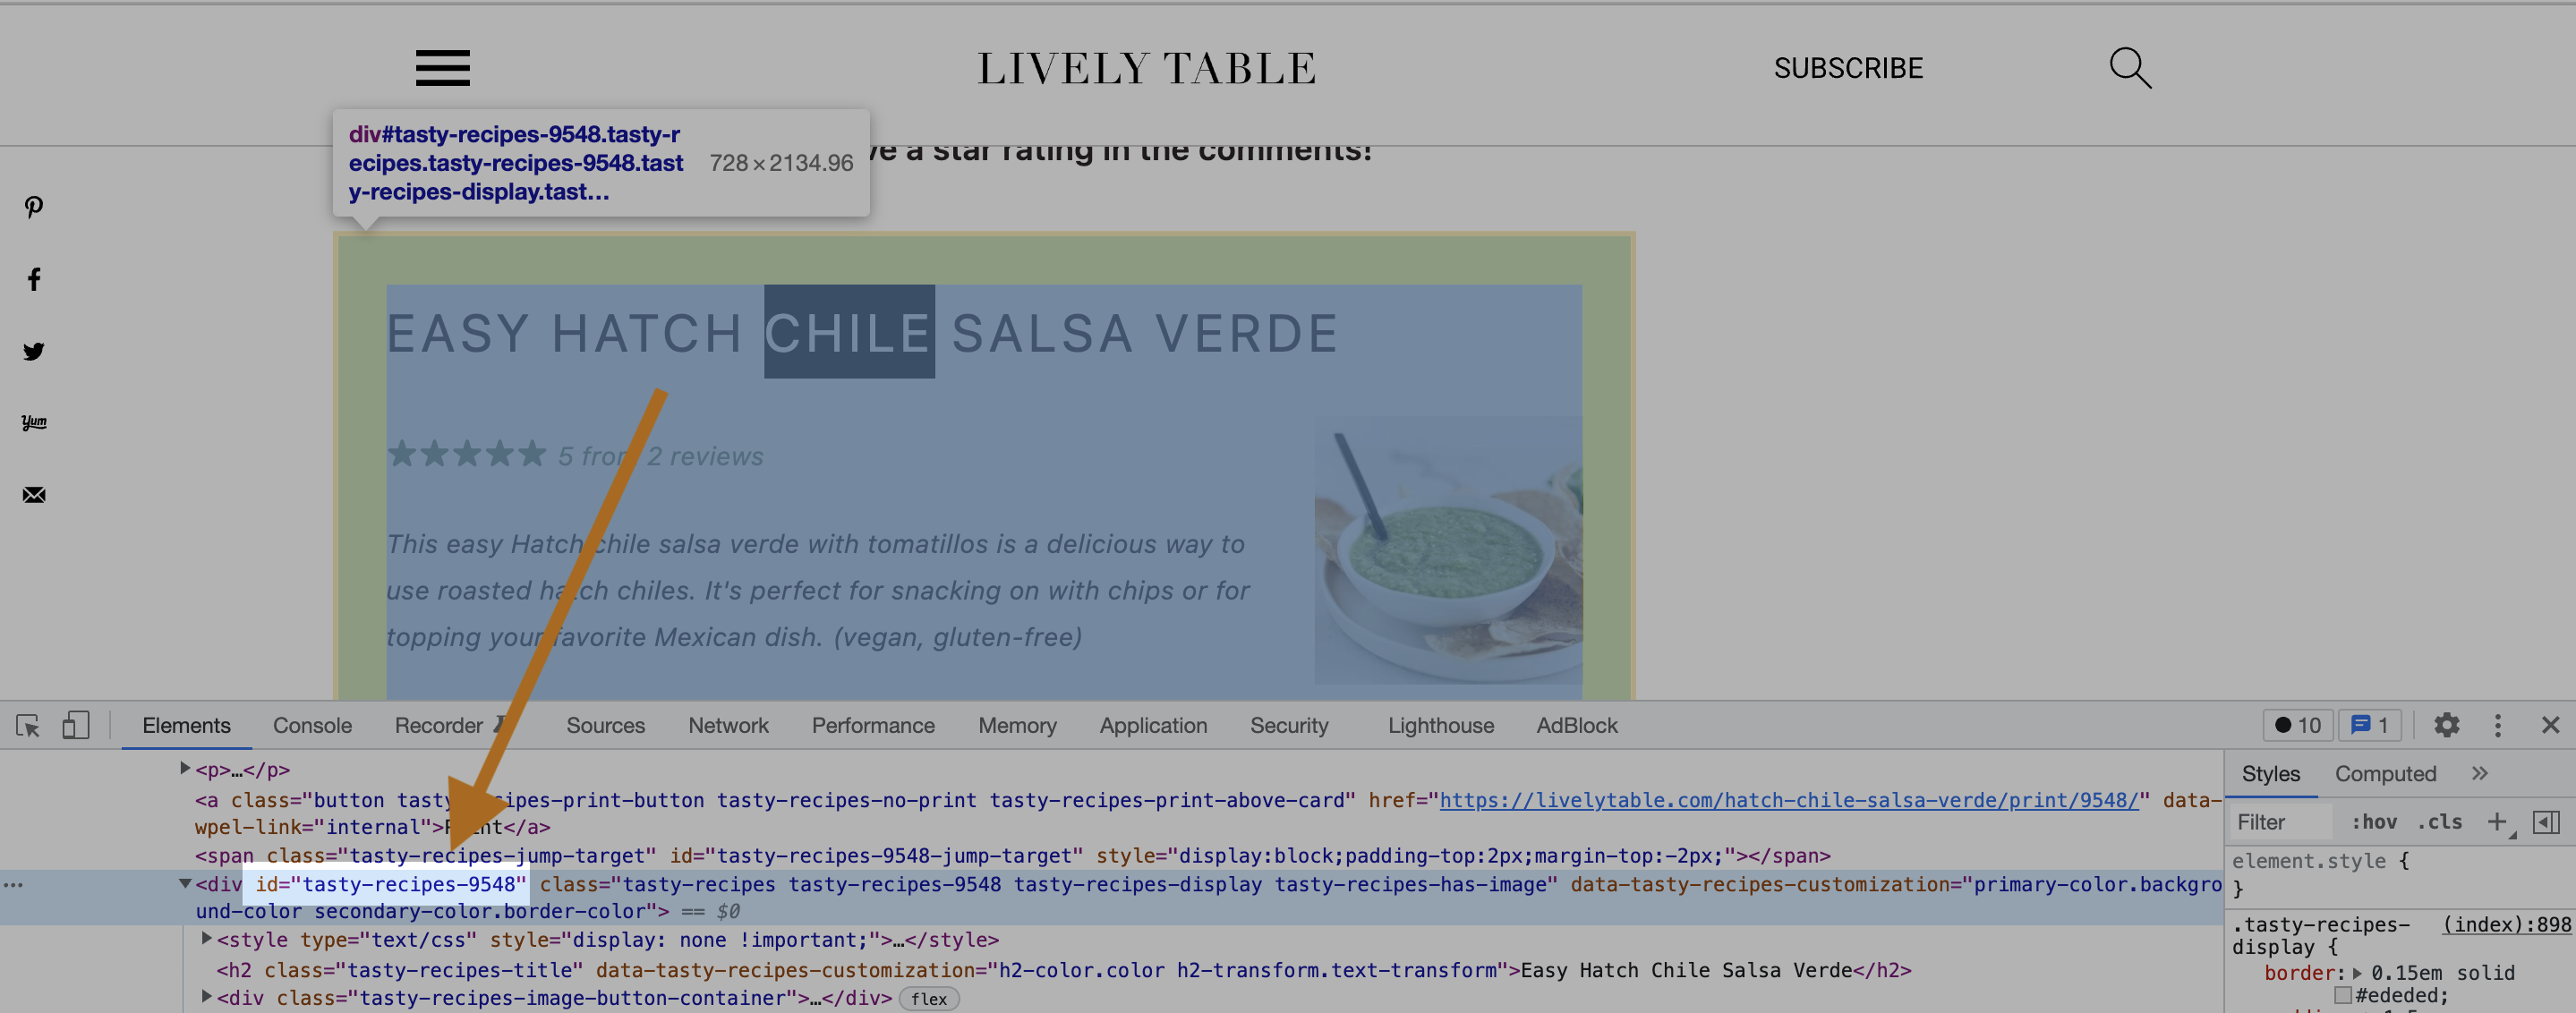
Find the recipe element
Let’s have our content script look for that tasty-recipes-[NUMBER] div. Add the following code to your content script:
window.addEventListener("load", function () {
  // Try to find recipe
  try {
    let recipeSection = document.querySelector('div[id*="tasty-recipes-"]');
    console.log("Found the recipe!", recipeSection);
  } catch (error) {
    console.log("We didn't find a recipe!", error.toString());
  }
});
Refresh your extension, and go to our recipe page: https://livelytable.com/hatch-chile-salsa-verde/
It works! The print statement shows up in the console stating that it found the recipe:
Replace the html to only be the recipe
Now lets get rid of all the junk! Replace your content script with the following code:
window.addEventListener("load", function () {
  let recipeSection = null;

  // Try to find recipe
  try {
    recipeSection = document.querySelector('div[id*="tasty-recipes-"]');
    console.log("Found the recipe!", recipeSection);
  } catch (error) {
    console.log("We didn't find a recipe!", error.toString());
  }

  if (recipeSection) {
    console.log("We found the recipe section!", recipeSection);
    // Override the html of the page to just be the recipe
    document.getElementsByTagName("html")[0].innerHTML =
      recipeSection.outerHTML;

    // Remove the footer
    document.getElementsByTagName("footer")[0].remove();
  }
});
The relevant bit that we added was:
  if (recipeSection) {
    console.log("We found the recipe section!", recipeSection);
    // Override the html of the page to just be the recipe
    document.getElementsByTagName("html")[0].innerHTML =
      recipeSection.outerHTML;

    // Remove the footer
    document.getElementsByTagName("footer")[0].remove();
  }
This checks if we found the recipe section and replaces the html of the page with the recipe section. Let’s run it!
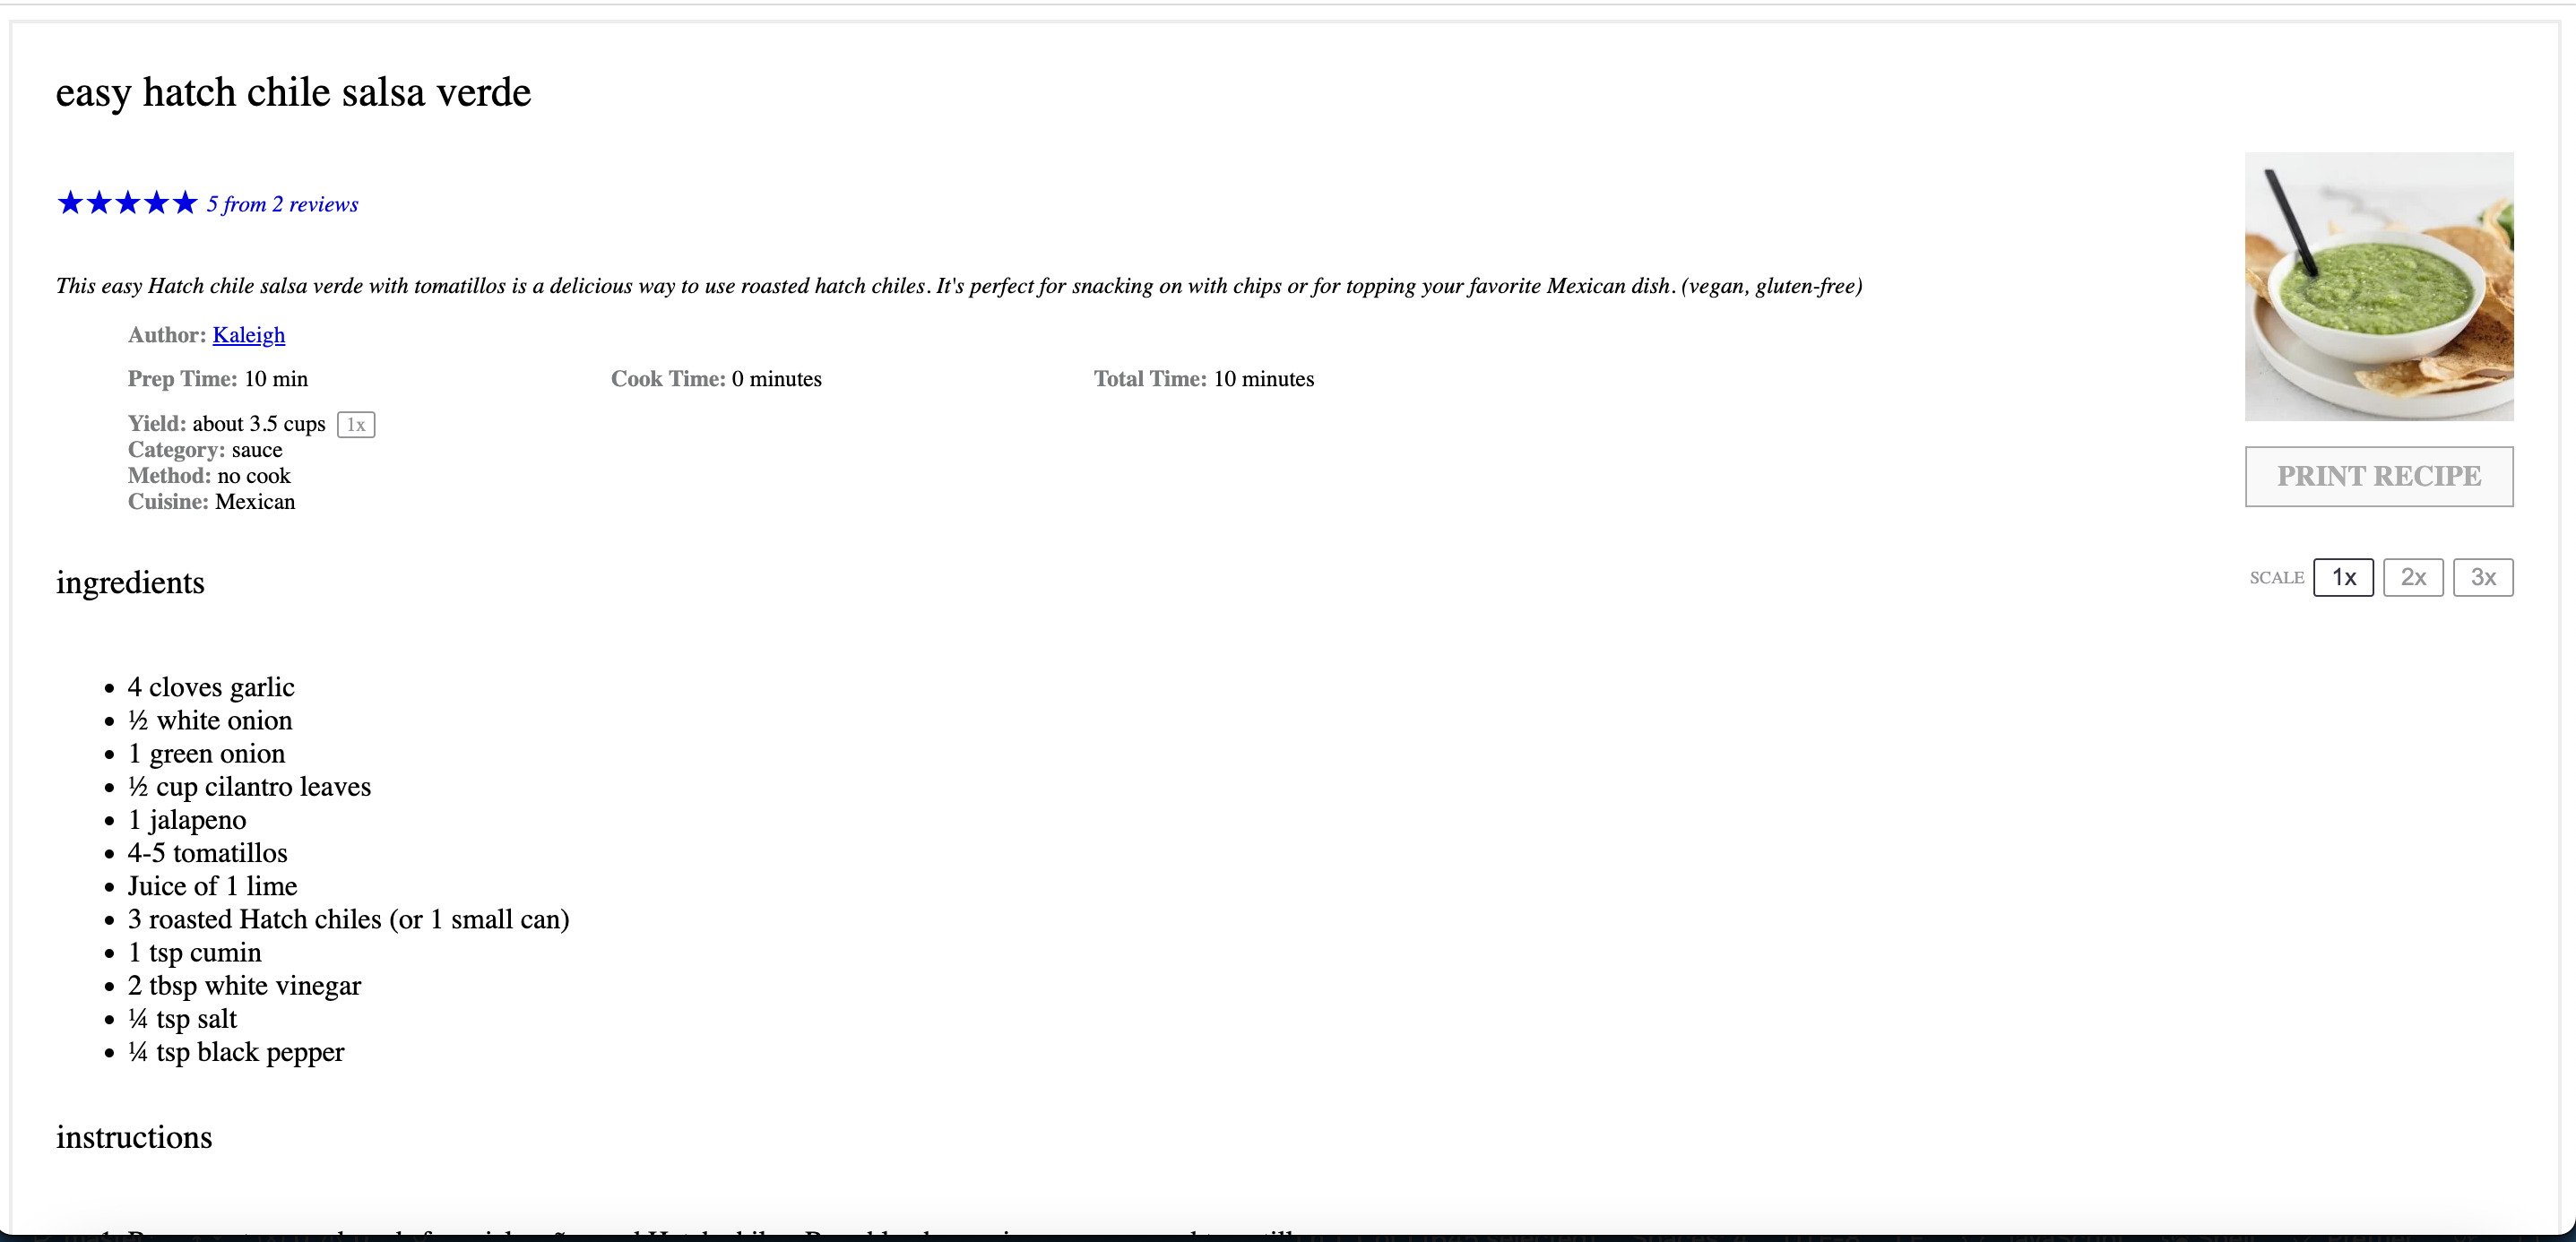
Nice! We successfully found the recipe section & removed all the extra junk. Now all we get is the recipe itself. You can test this out on other recipes on livelytable.com and see that it works for all the recipes.
Step 5: Add a button on the popup to do the cleanup
It’s great that our extension is cleaning up the recipe page, but maybe we don’t want it to happen automatically. Let’s change things up a bit and require the user to kick off the cleanup from the extension’s popup menu.
Add a popup html file and script
The first thing we need to do is add a few files. Create a popup.html file & a popup.js file. Your directory structure should now look like this:
Tell the manifest about the popup files
We need to let the manifest know that we have a popup now. Add this to your manifest.json:
  "action": {
    "default_popup": "popup.html",
    "default_title": "Just show me the recipe!",
    "default_icon": {
      "16": "images/16x16.png",
      "48": "images/48x48.png",
      "128": "images/128x128.png"
    }
  }
Your manifest file should now look like:
{
  "name": "Just show me the recipe",
  "version": "0.1",
  "description": "No backstory, ads, etc.  Just show me the recipe.",
  "icons": {
    "16": "images/16x16.png",
    "48": "images/48x48.png",
    "128": "images/128x128.png"
  },
  "manifest_version": 3,
  "content_scripts": [
    {
      "matches": ["https://livelytable.com/*"],
      "js": ["content.js"]
    }
  ],
  "action": {
    "default_popup": "popup.html",
    "default_title": "Just show me the recipe!",
    "default_icon": {
      "16": "images/16x16.png",
      "48": "images/48x48.png",
      "128": "images/128x128.png"
    }
  }
}
Add some basic html
Let’s add some basic html with a “Clean up” button. Add the following to popup.html:
<html style="width: 400px; height: 200px">
  <div
    style="
      display: flex;
      flex-direction: column;
      justify-content: center;
      align-items: center;
      height: 100%;
    "
  >
    <h1>Just show me the recipe!</h1>
    <button id="btn-clean-up" style="width: 100px; height: 40px">
      Clean up!
    </button>
  </div>
  <script src="popup.js"></script>
</html>
NOTE: Notice the second to last line. We’re adding a reference to our popup.js script.
Your popup file should look like this now:
Wire up the button
Okay now that we have a basic popup displaying, let’s wire it up to have our popup script tell the content script to clean up the recipe page. Add this to your popup.js file:
window.addEventListener("load", function () {
  // Set an on click listener for our clean up button that sends a message to our content script
  document.getElementById("btn-clean-up").addEventListener("click", () => {
    // If our content script is running, we'll find an active tab to send our message to
    // NOTE: Our content script will only currently run on livelytable.com pages
    chrome.tabs.query({ currentWindow: true, active: true }, function (tabs) {
      var activeTab = tabs[0];
      chrome.tabs.sendMessage(activeTab.id, { message: "cleanup" });
    });
  });
});
This adds an event listener to our clean up button that will send our content script a message.
There’s still one problem, our content script doesn’t yet know how to listen for messages. Let’s add that ability. Replace your content.js file with the following:
window.addEventListener("load", function () {
  chrome.runtime.onMessage.addListener(function (
    request,
    sender,
    sendResponse
  ) {
    if (request.message === "cleanup") {
      let recipeSection = null;

      // Try to find recipe
      try {
        recipeSection = document.querySelector('div[id*="tasty-recipes-"]');
        console.log("Found the recipe!", recipeSection);
      } catch (error) {
        console.log("We didn't find a recipe!", error.toString());
      }

      if (recipeSection) {
        console.log("We found the recipe section!", recipeSection);
        // Override the html of the page to just be the recipe
        document.getElementsByTagName("html")[0].innerHTML =
          recipeSection.outerHTML;

        // Remove the footer
        document.getElementsByTagName("footer")[0].remove();
      }
    }
  });
});
The main part that we added here was:
  chrome.runtime.onMessage.addListener(function (
    request,
    sender,
    sendResponse
  ) {
    if (request.message === "cleanup") {
Our content script is now listening for messages. If the message is a cleanup message, the content script will proceed to do the cleanup of the page.
Let’s try it out again!
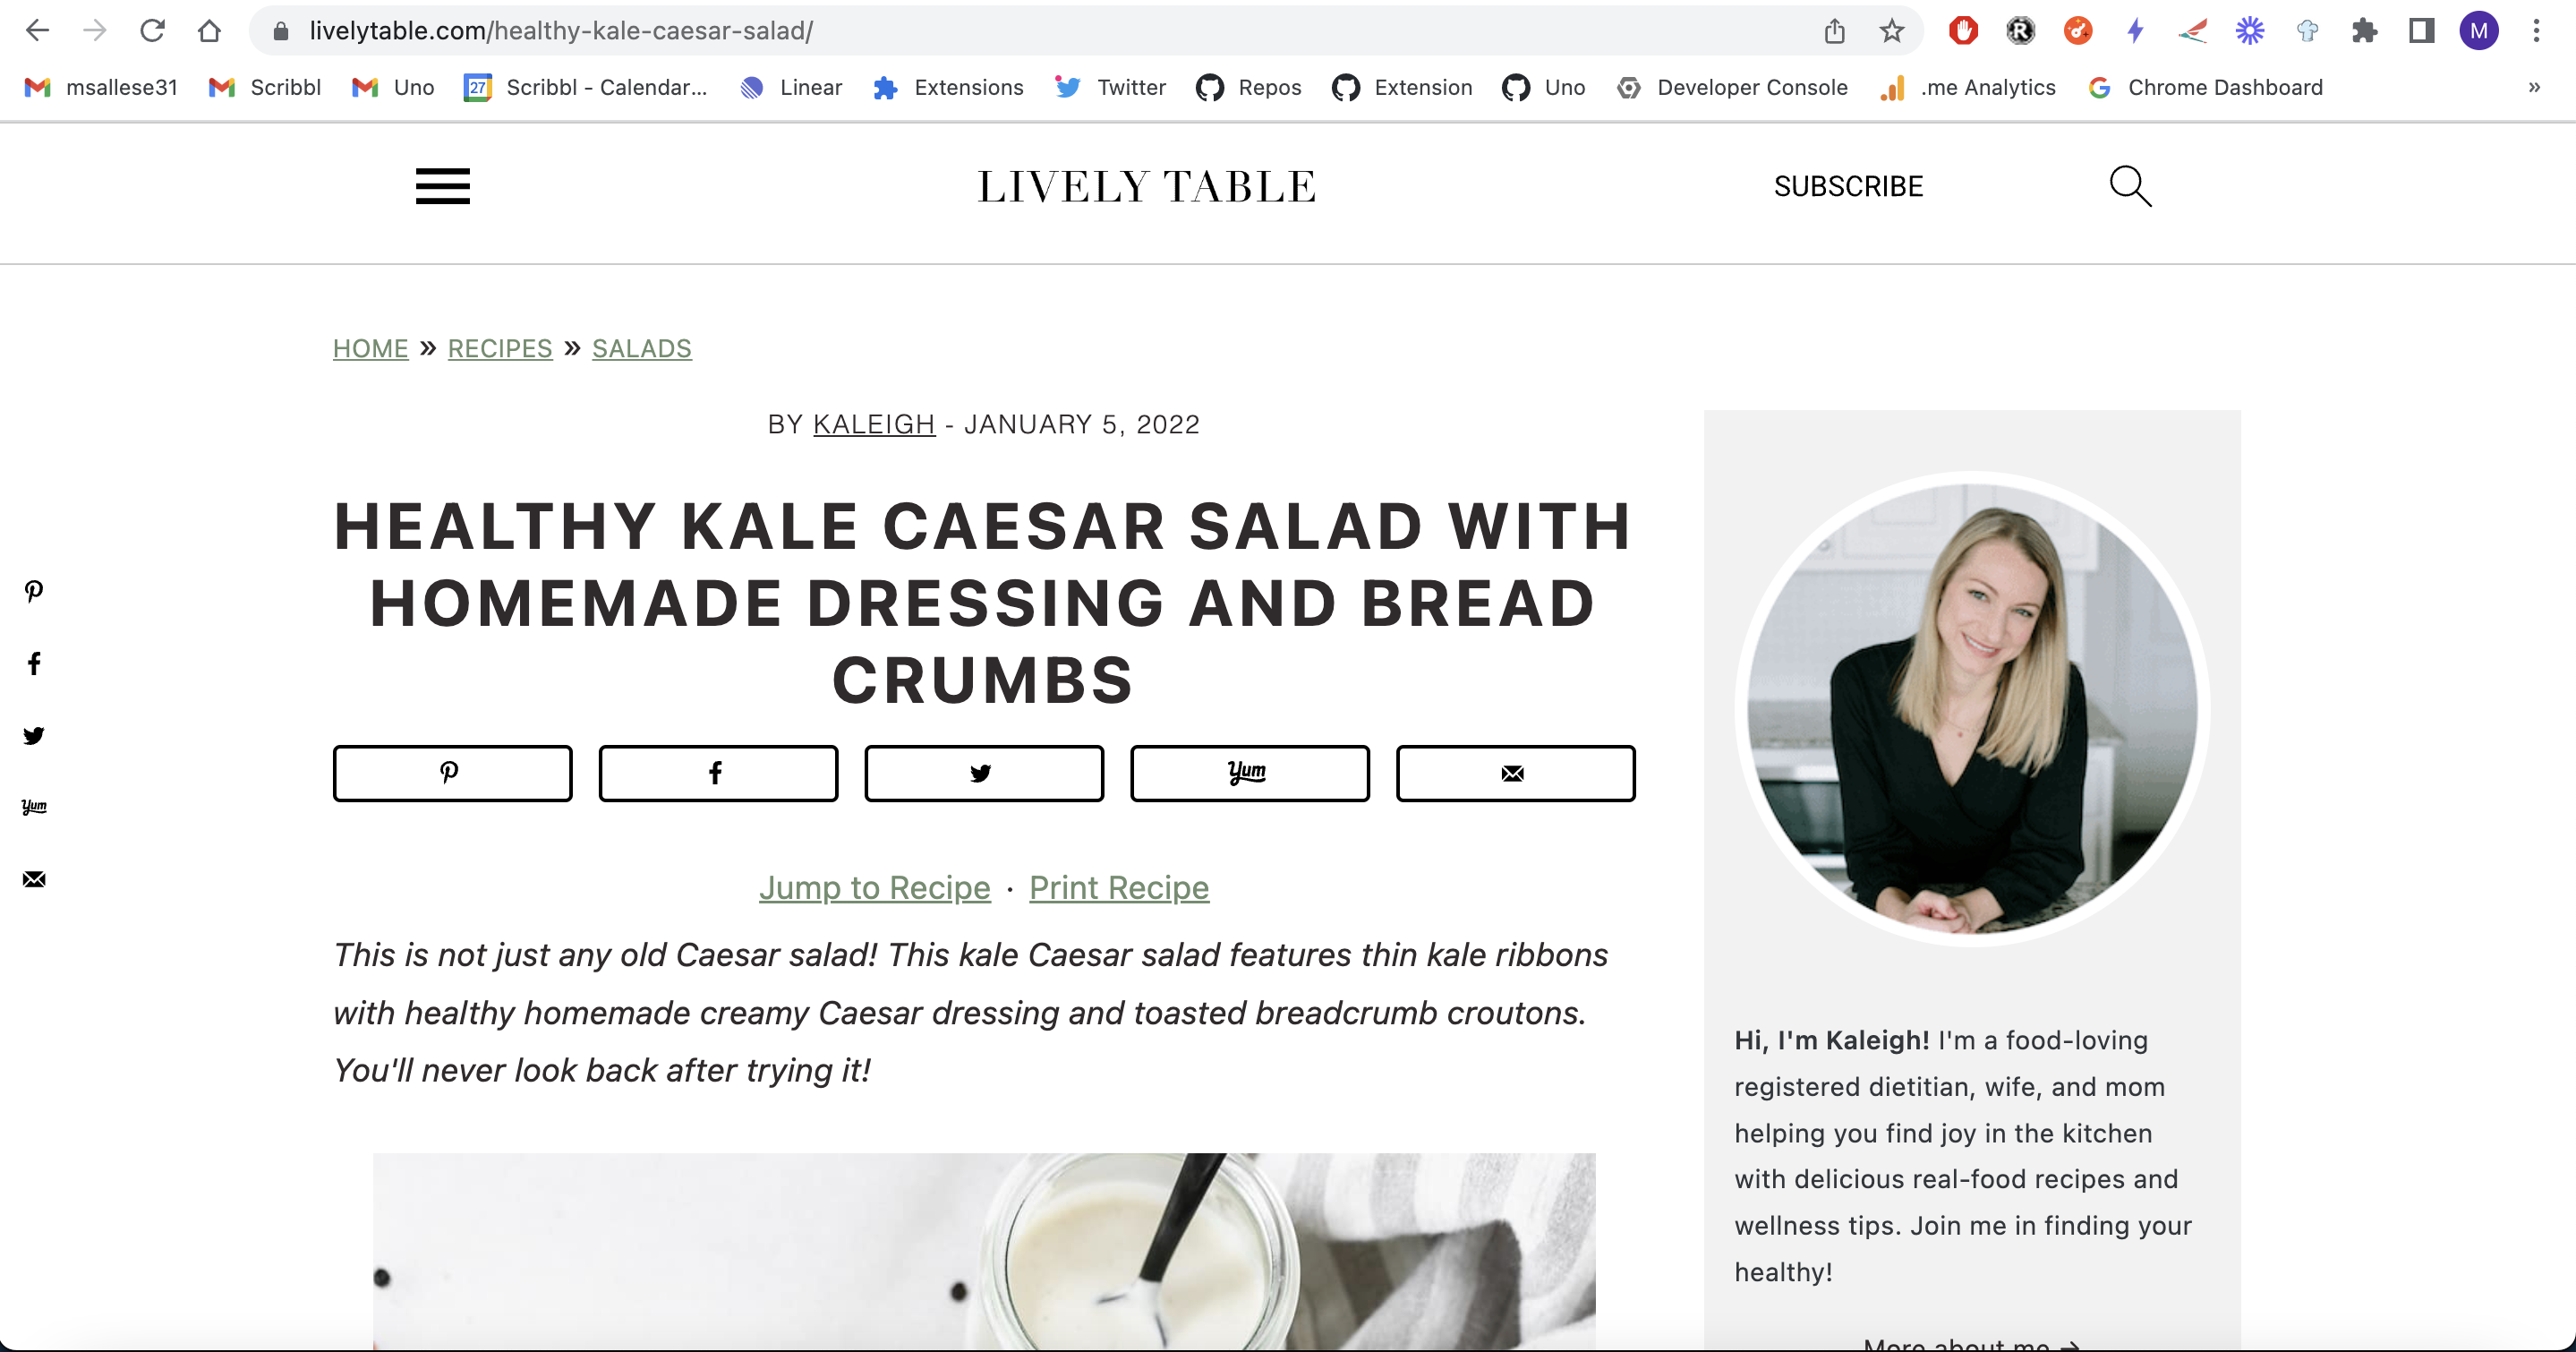
Go to https://livelytable.com/healthy-kale-caesar-salad/. You should see the normal page:
Now, open up our popup and click on the “Clean up” button:
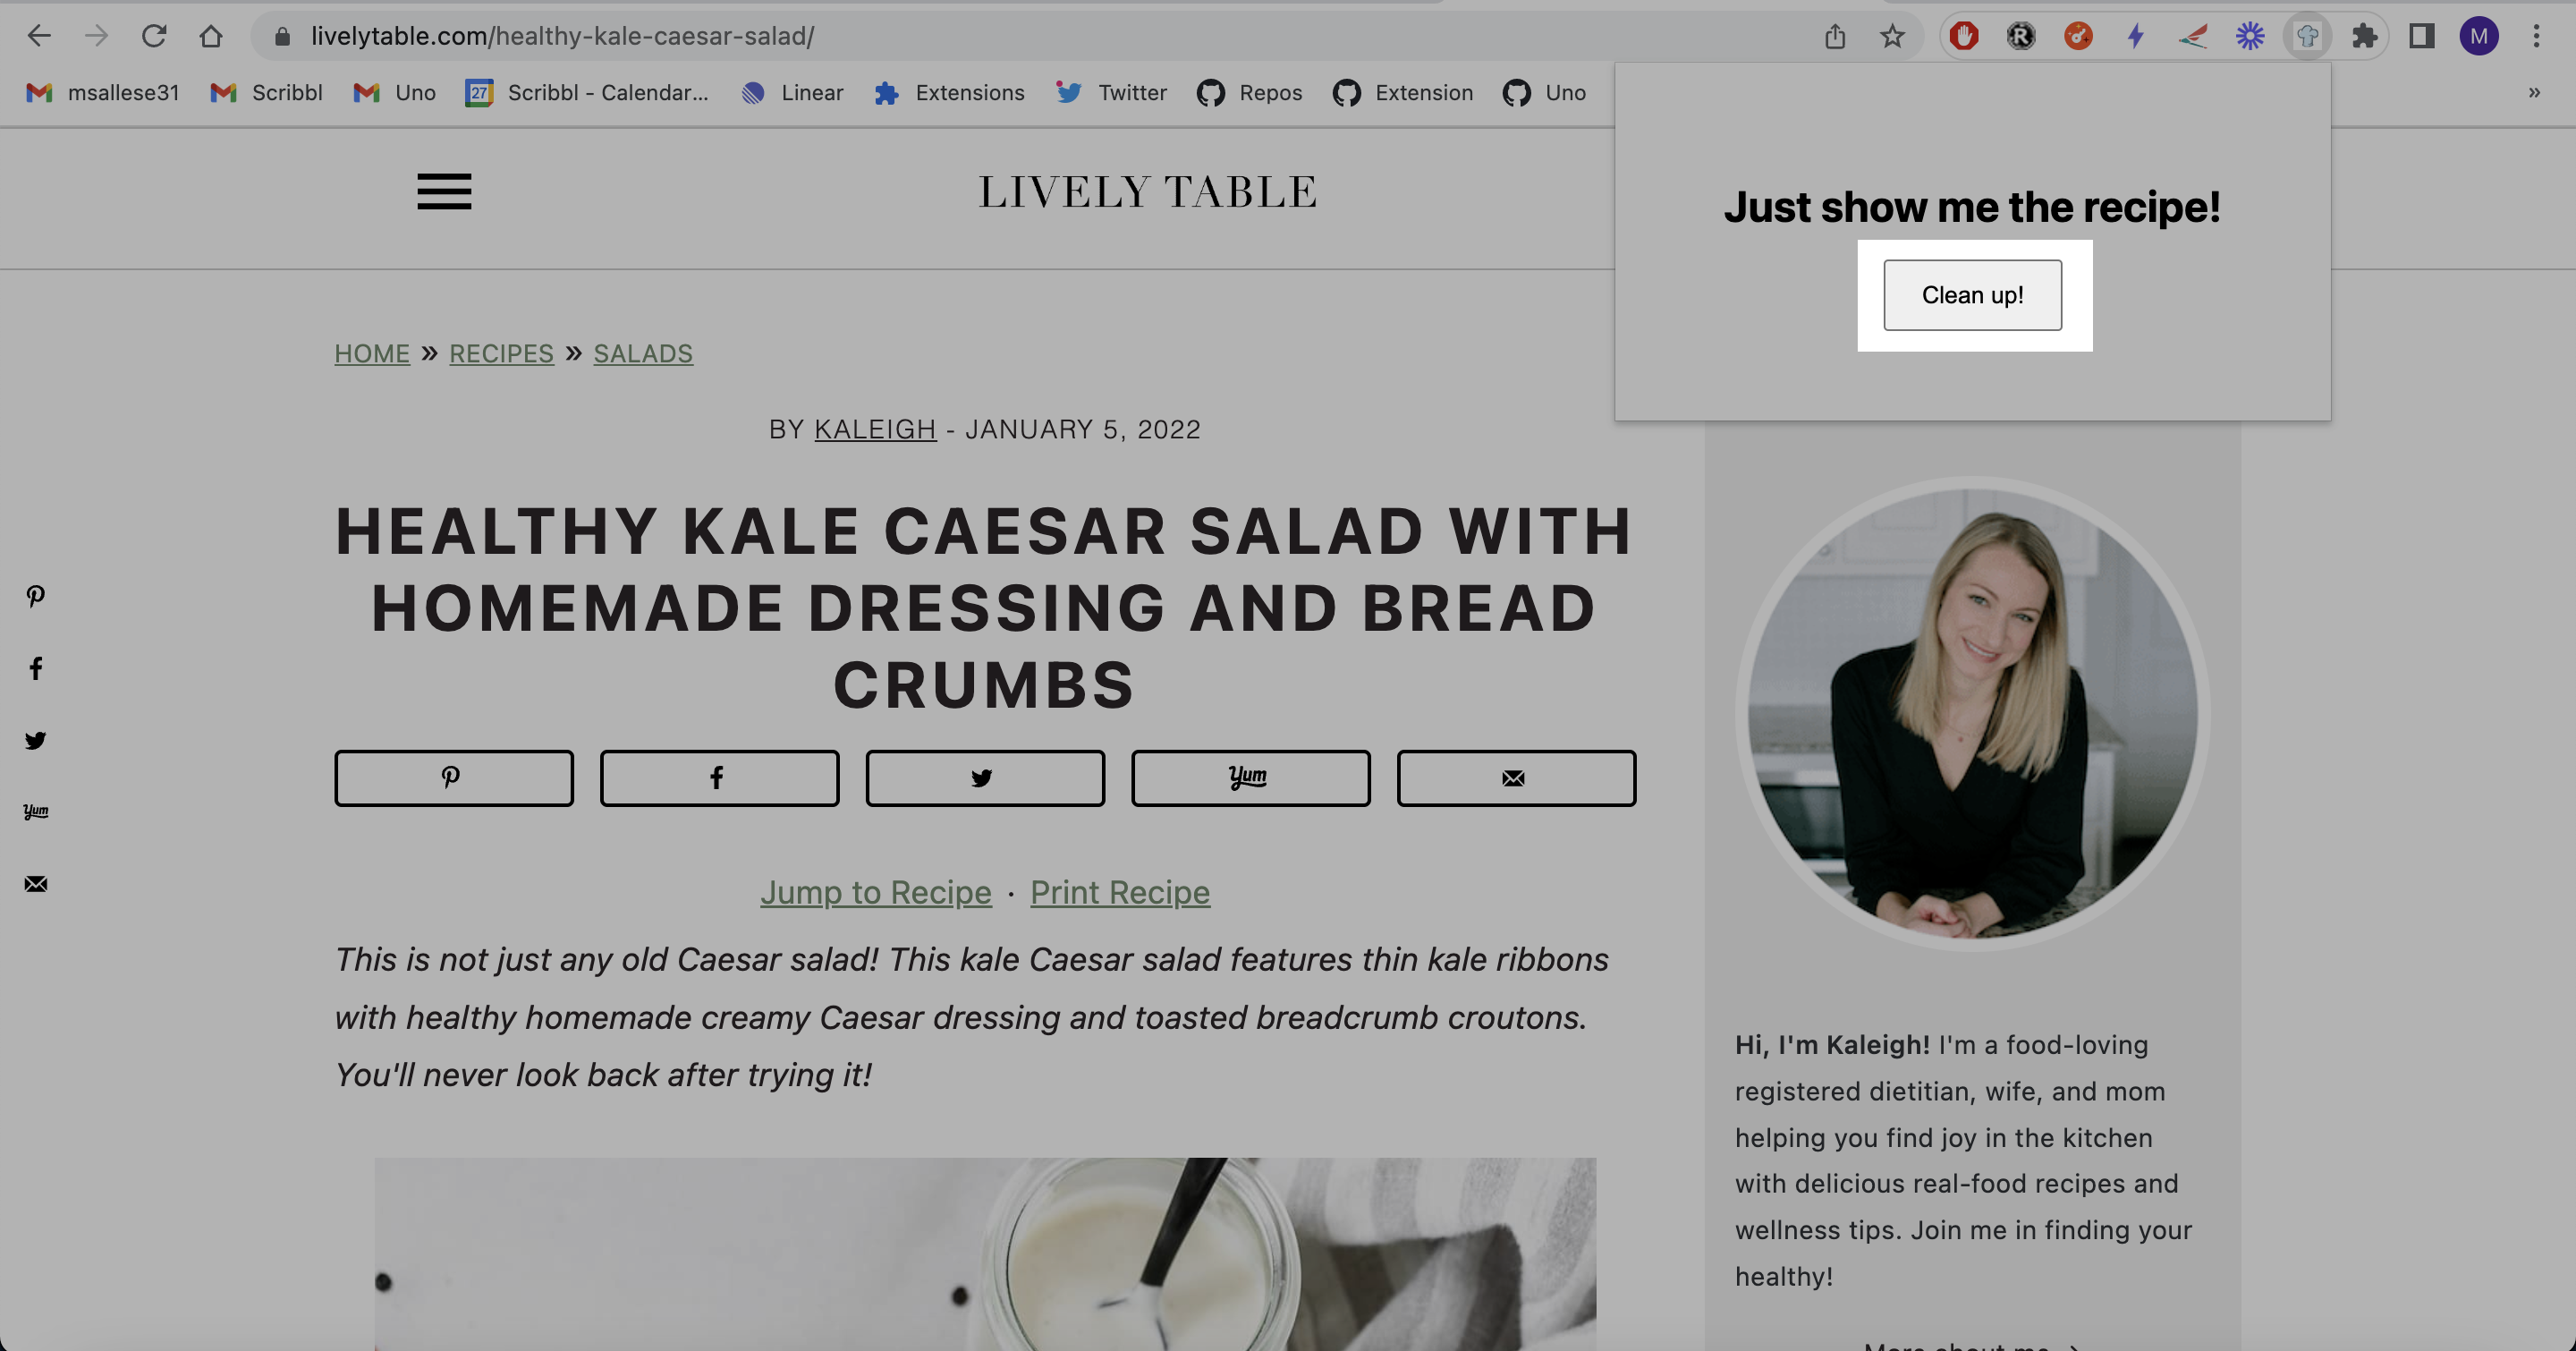
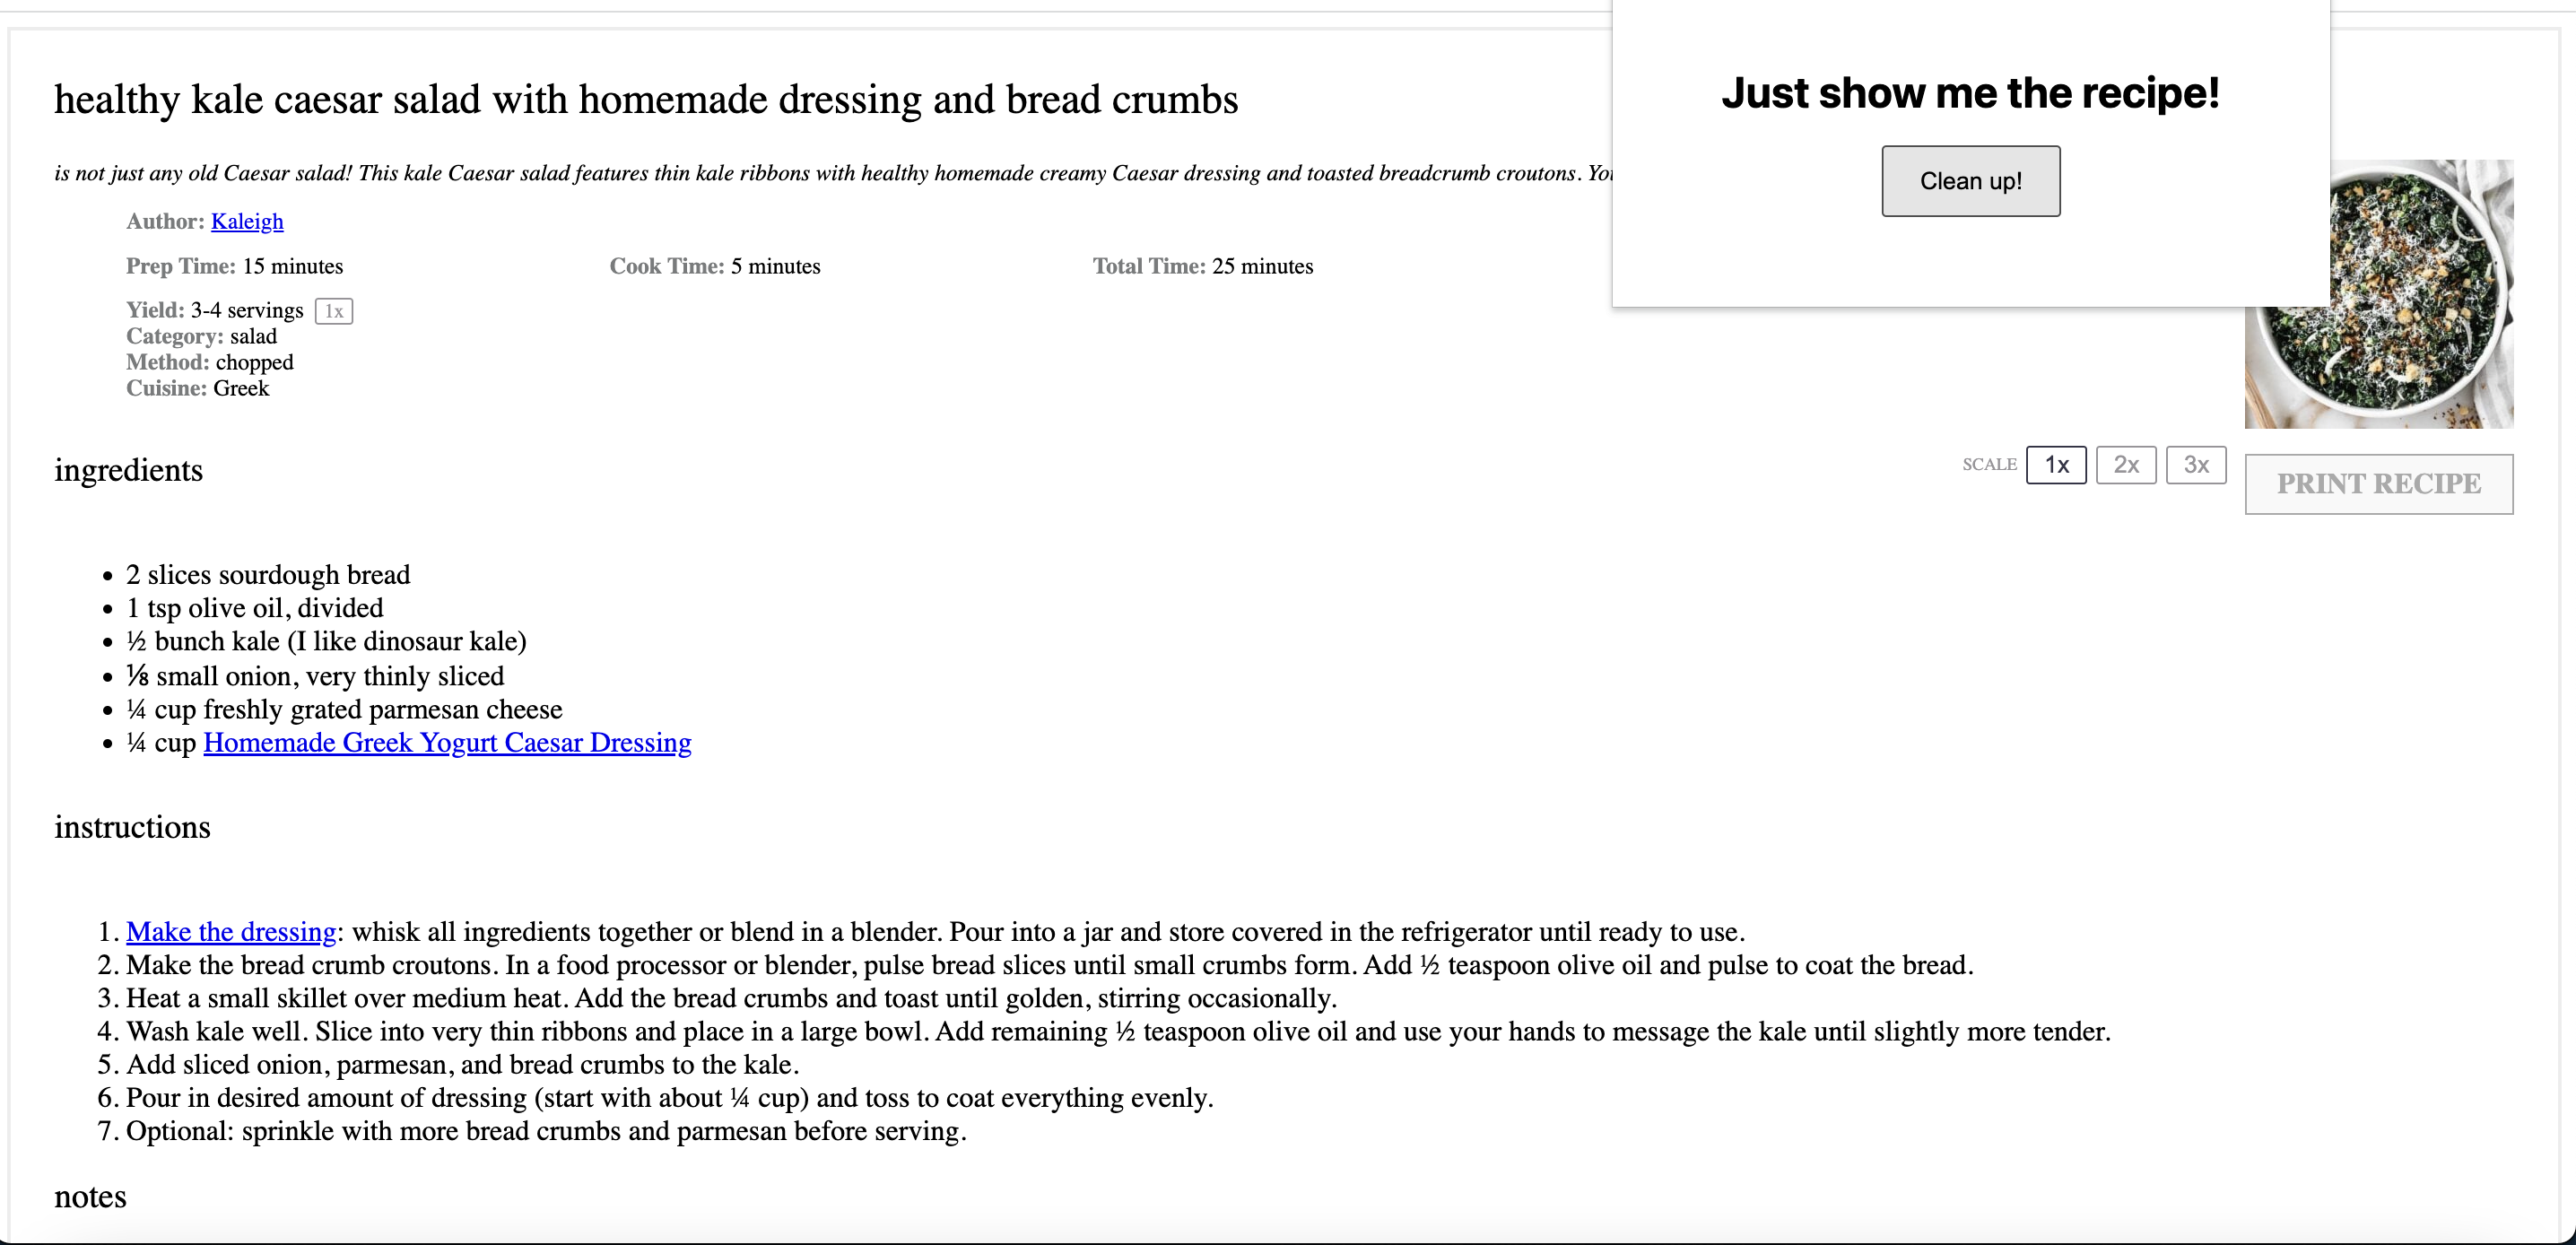
Click it and watch the page get cleaned up!
Step 6: Chrome store submission!
Now that we have an extension that works, let’s submit it to the chrome store so others can use it! First we’ll have to register as a developer.
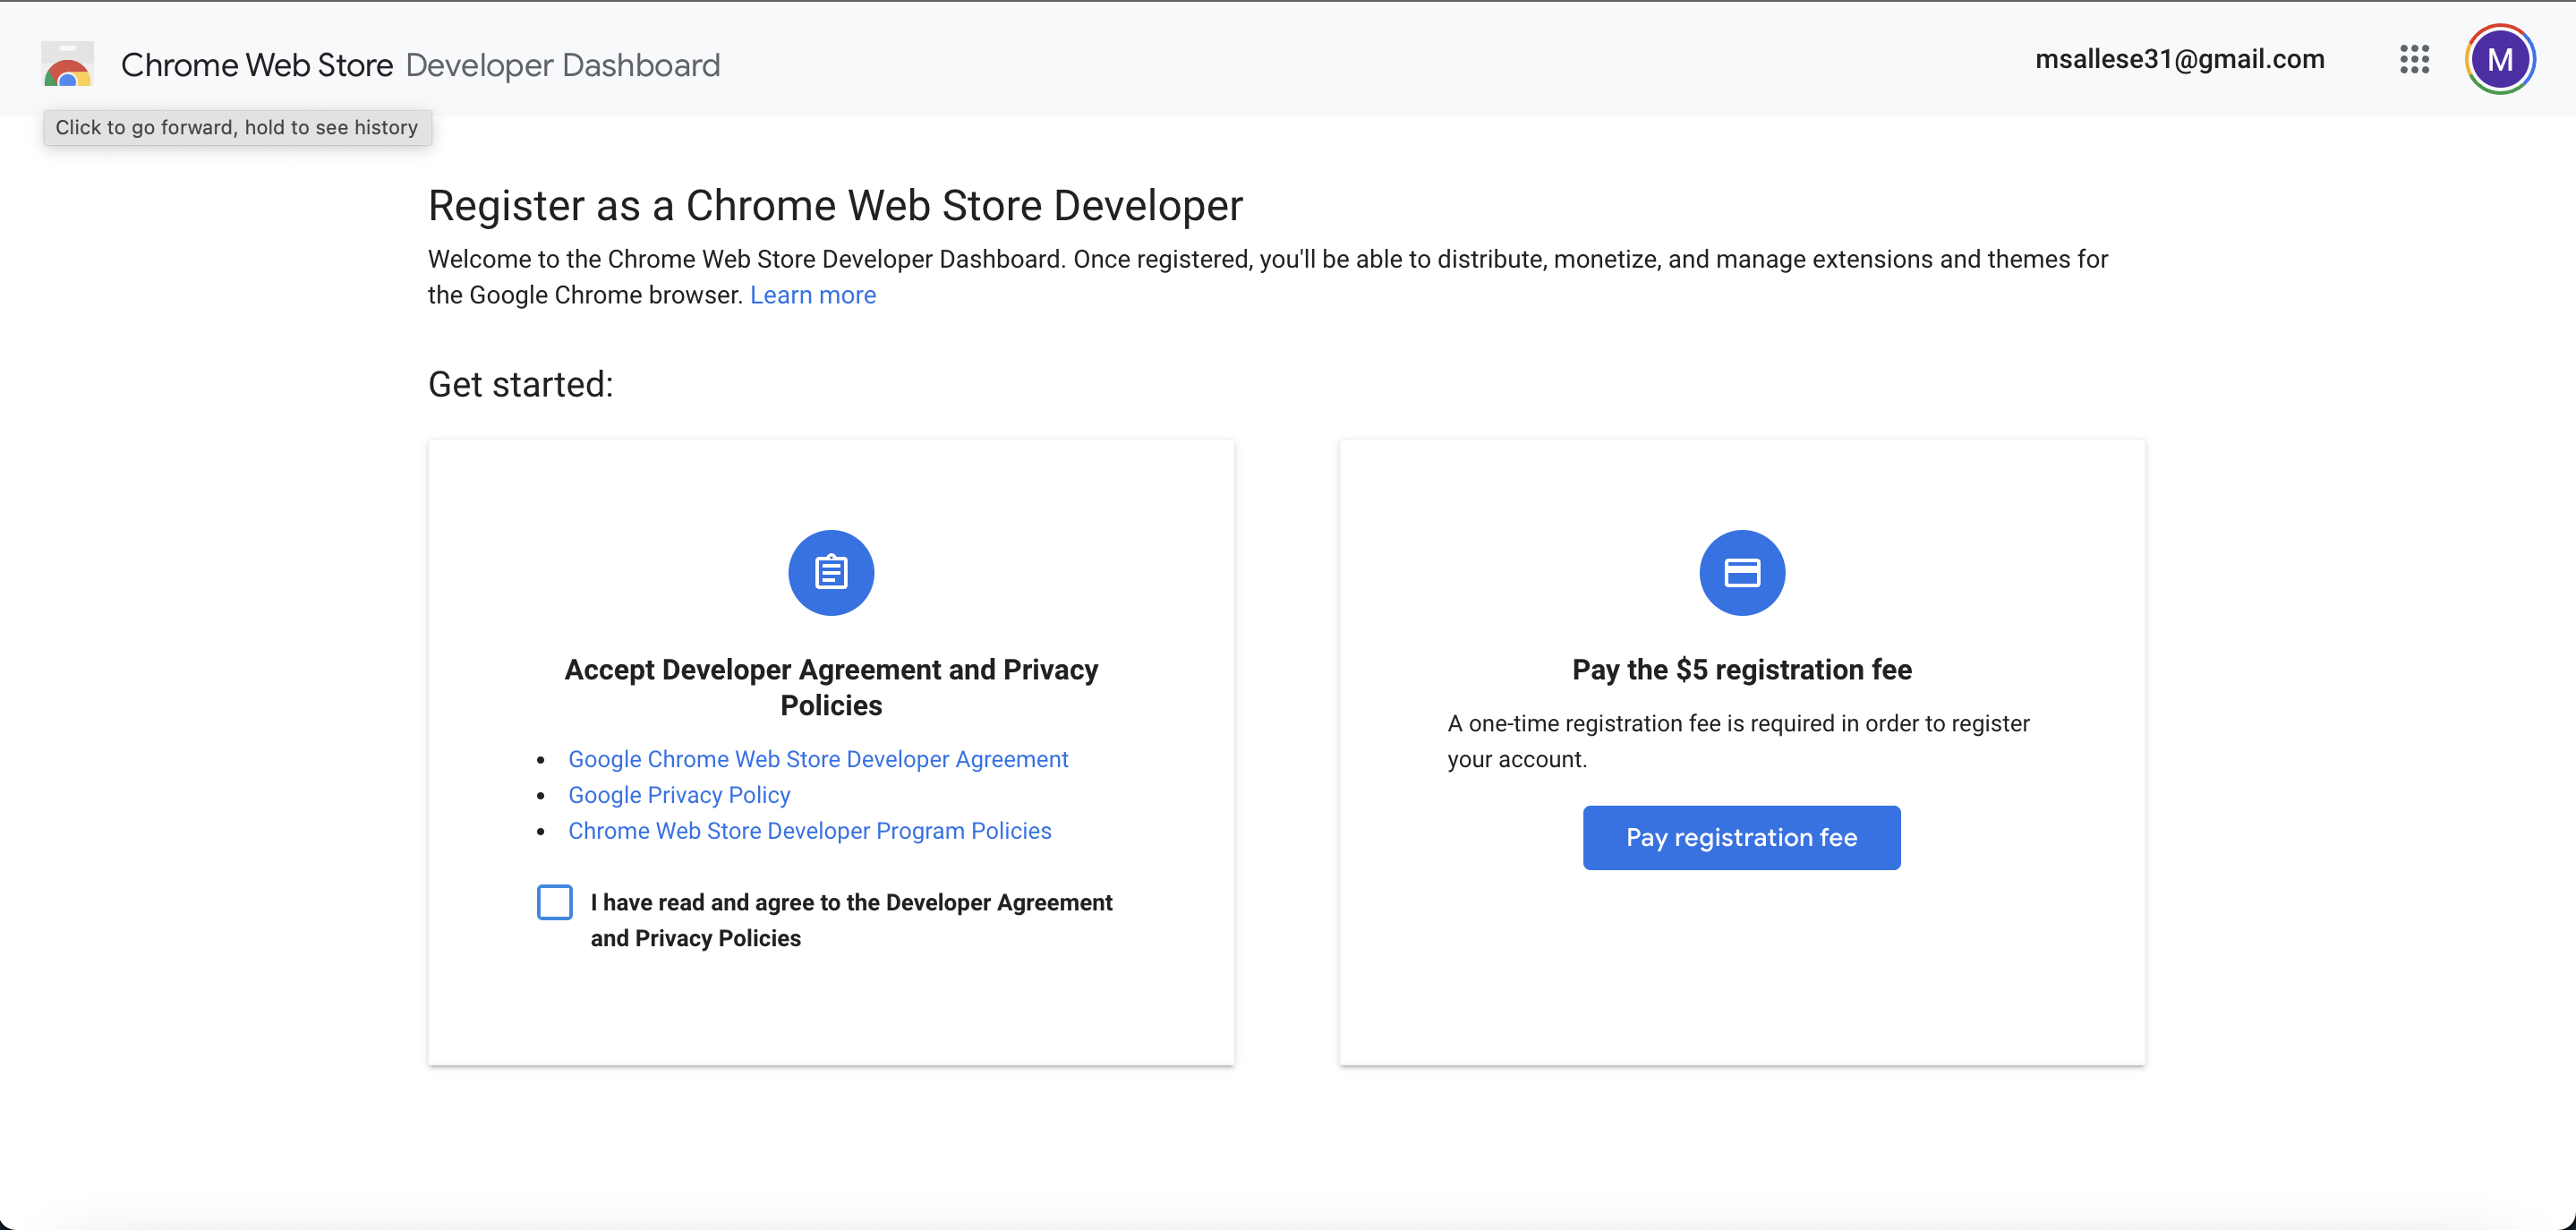
Setup developer account
To submit a chrome extension to the chrome store, you’ll have to register as a developer. Go to https://chrome.google.com/webstore/devconsole/register, pay the registration fee, and get all signed up.
Submit your extension
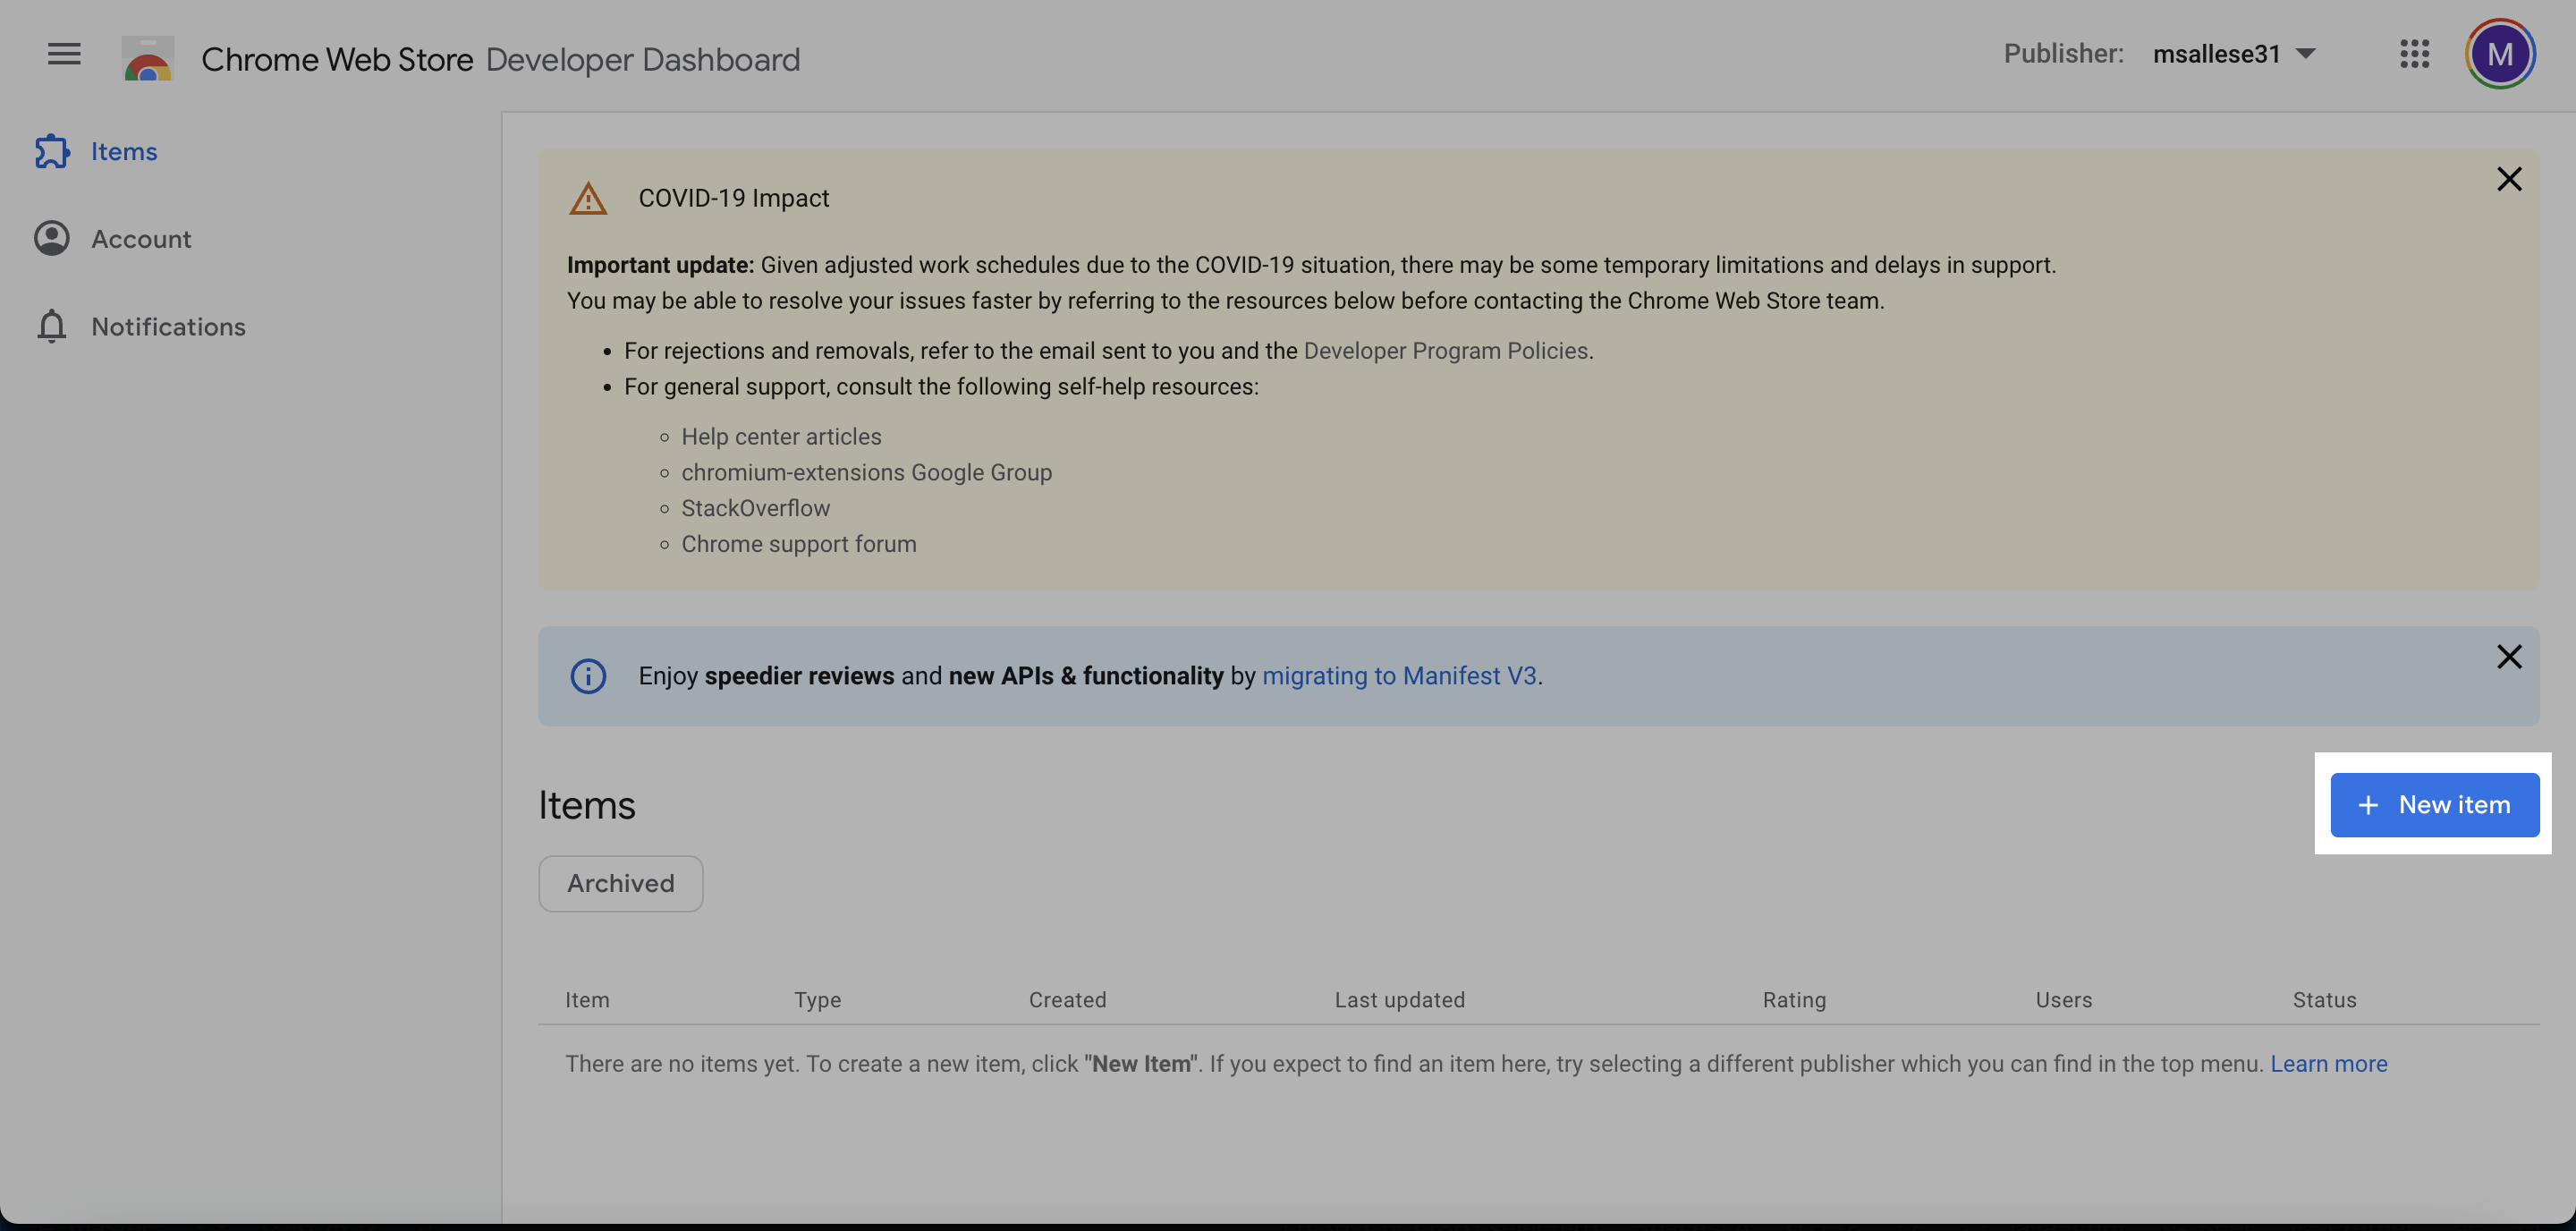
After you register as a developer, you’ll be ready to submit your extension. From https://chrome.google.com/webstore/devconsole, click on “New Item”:
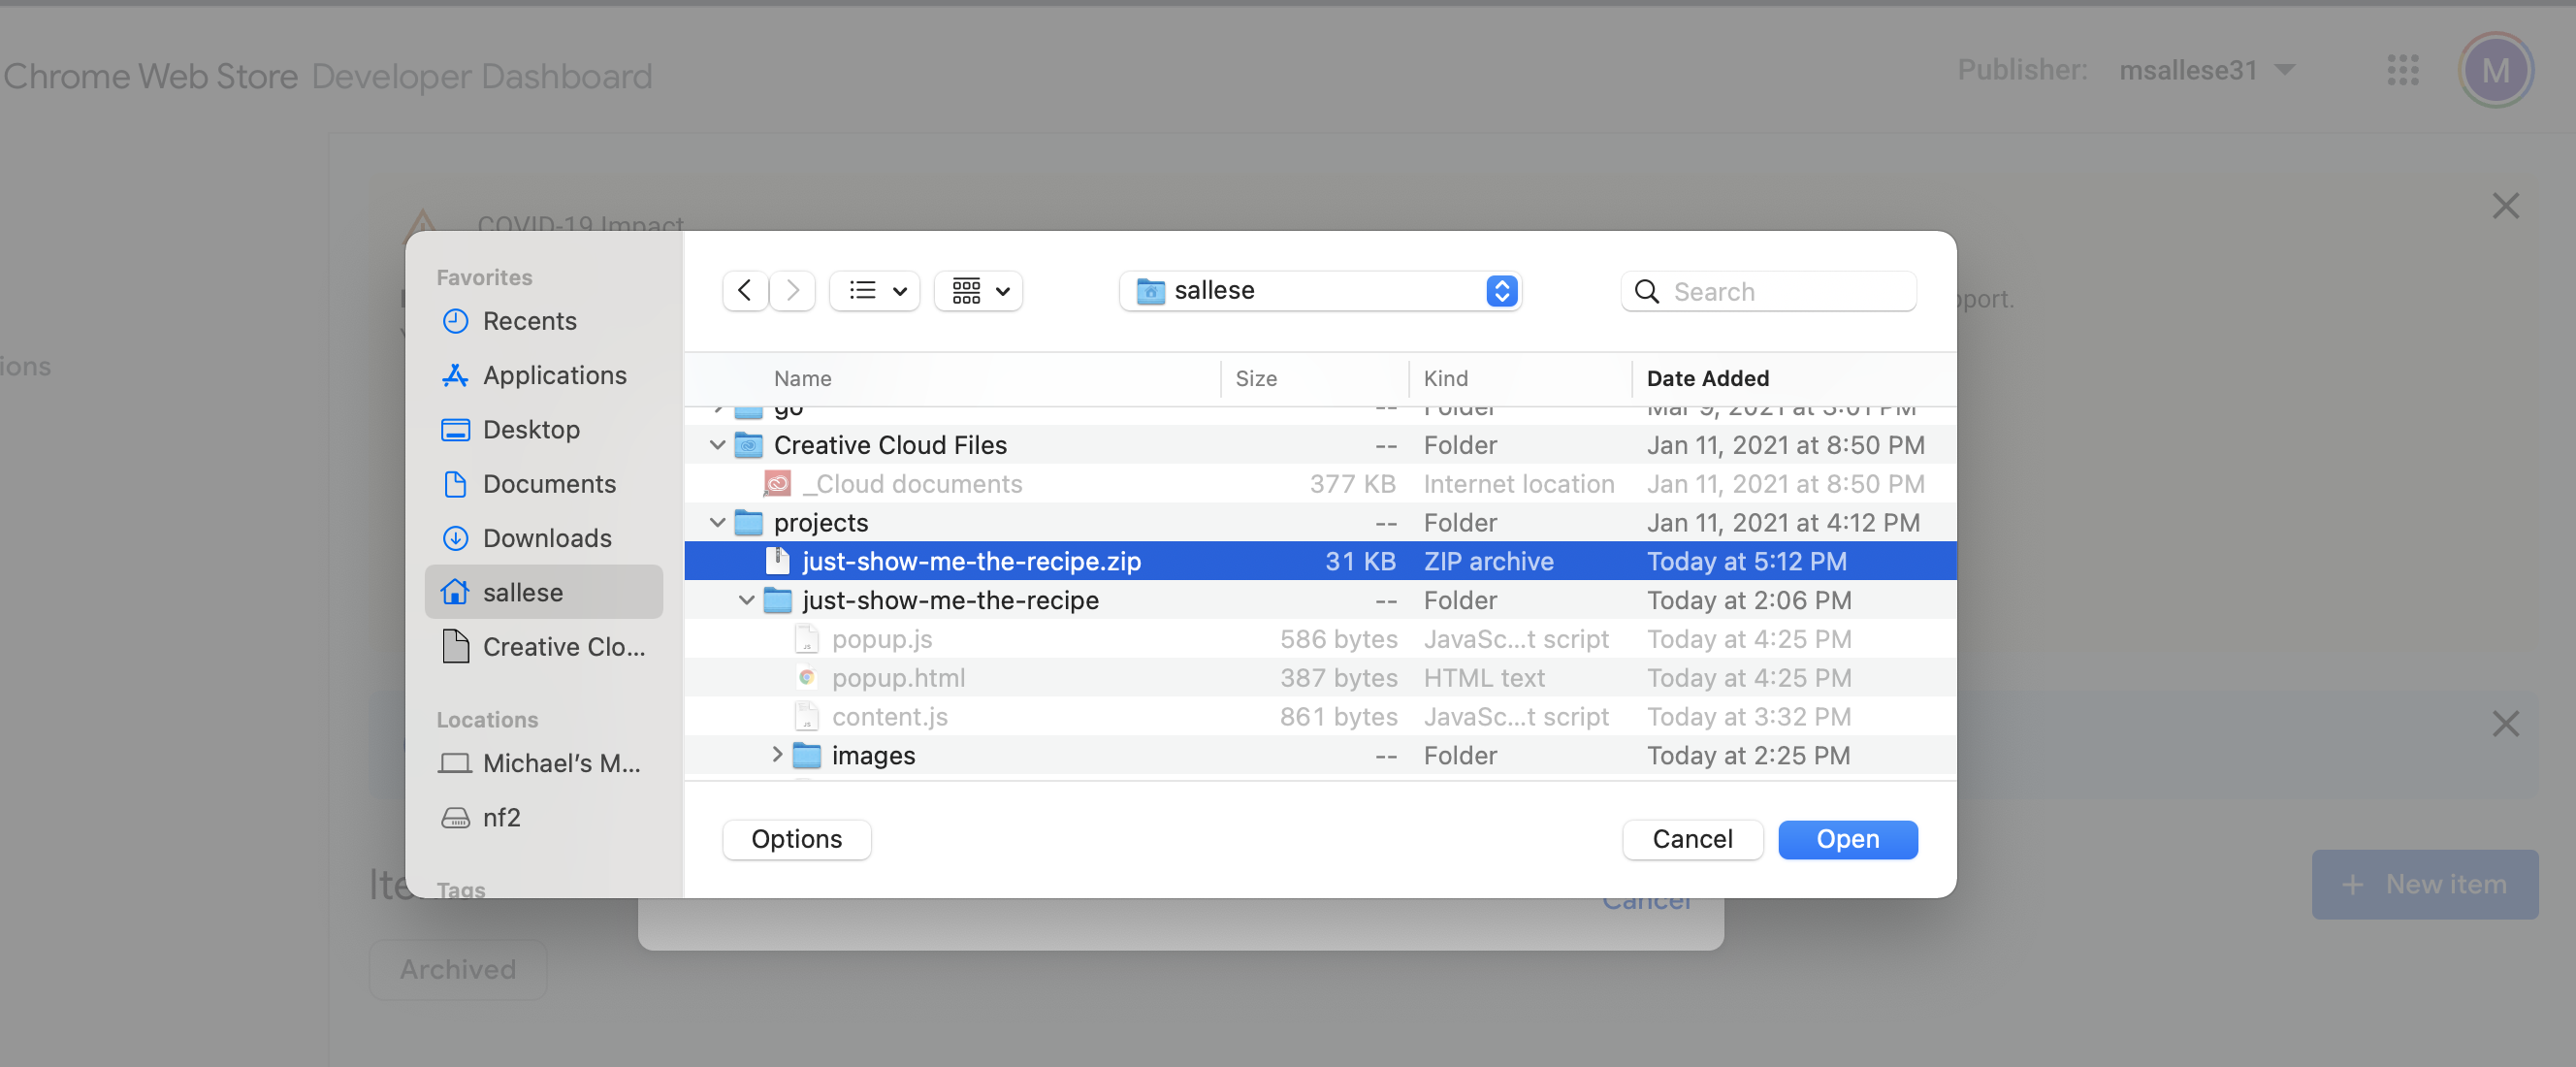
Chrome wants you to submit your extension in a zip file. Zip up the root directory of your chrome extension, and select it as a file:
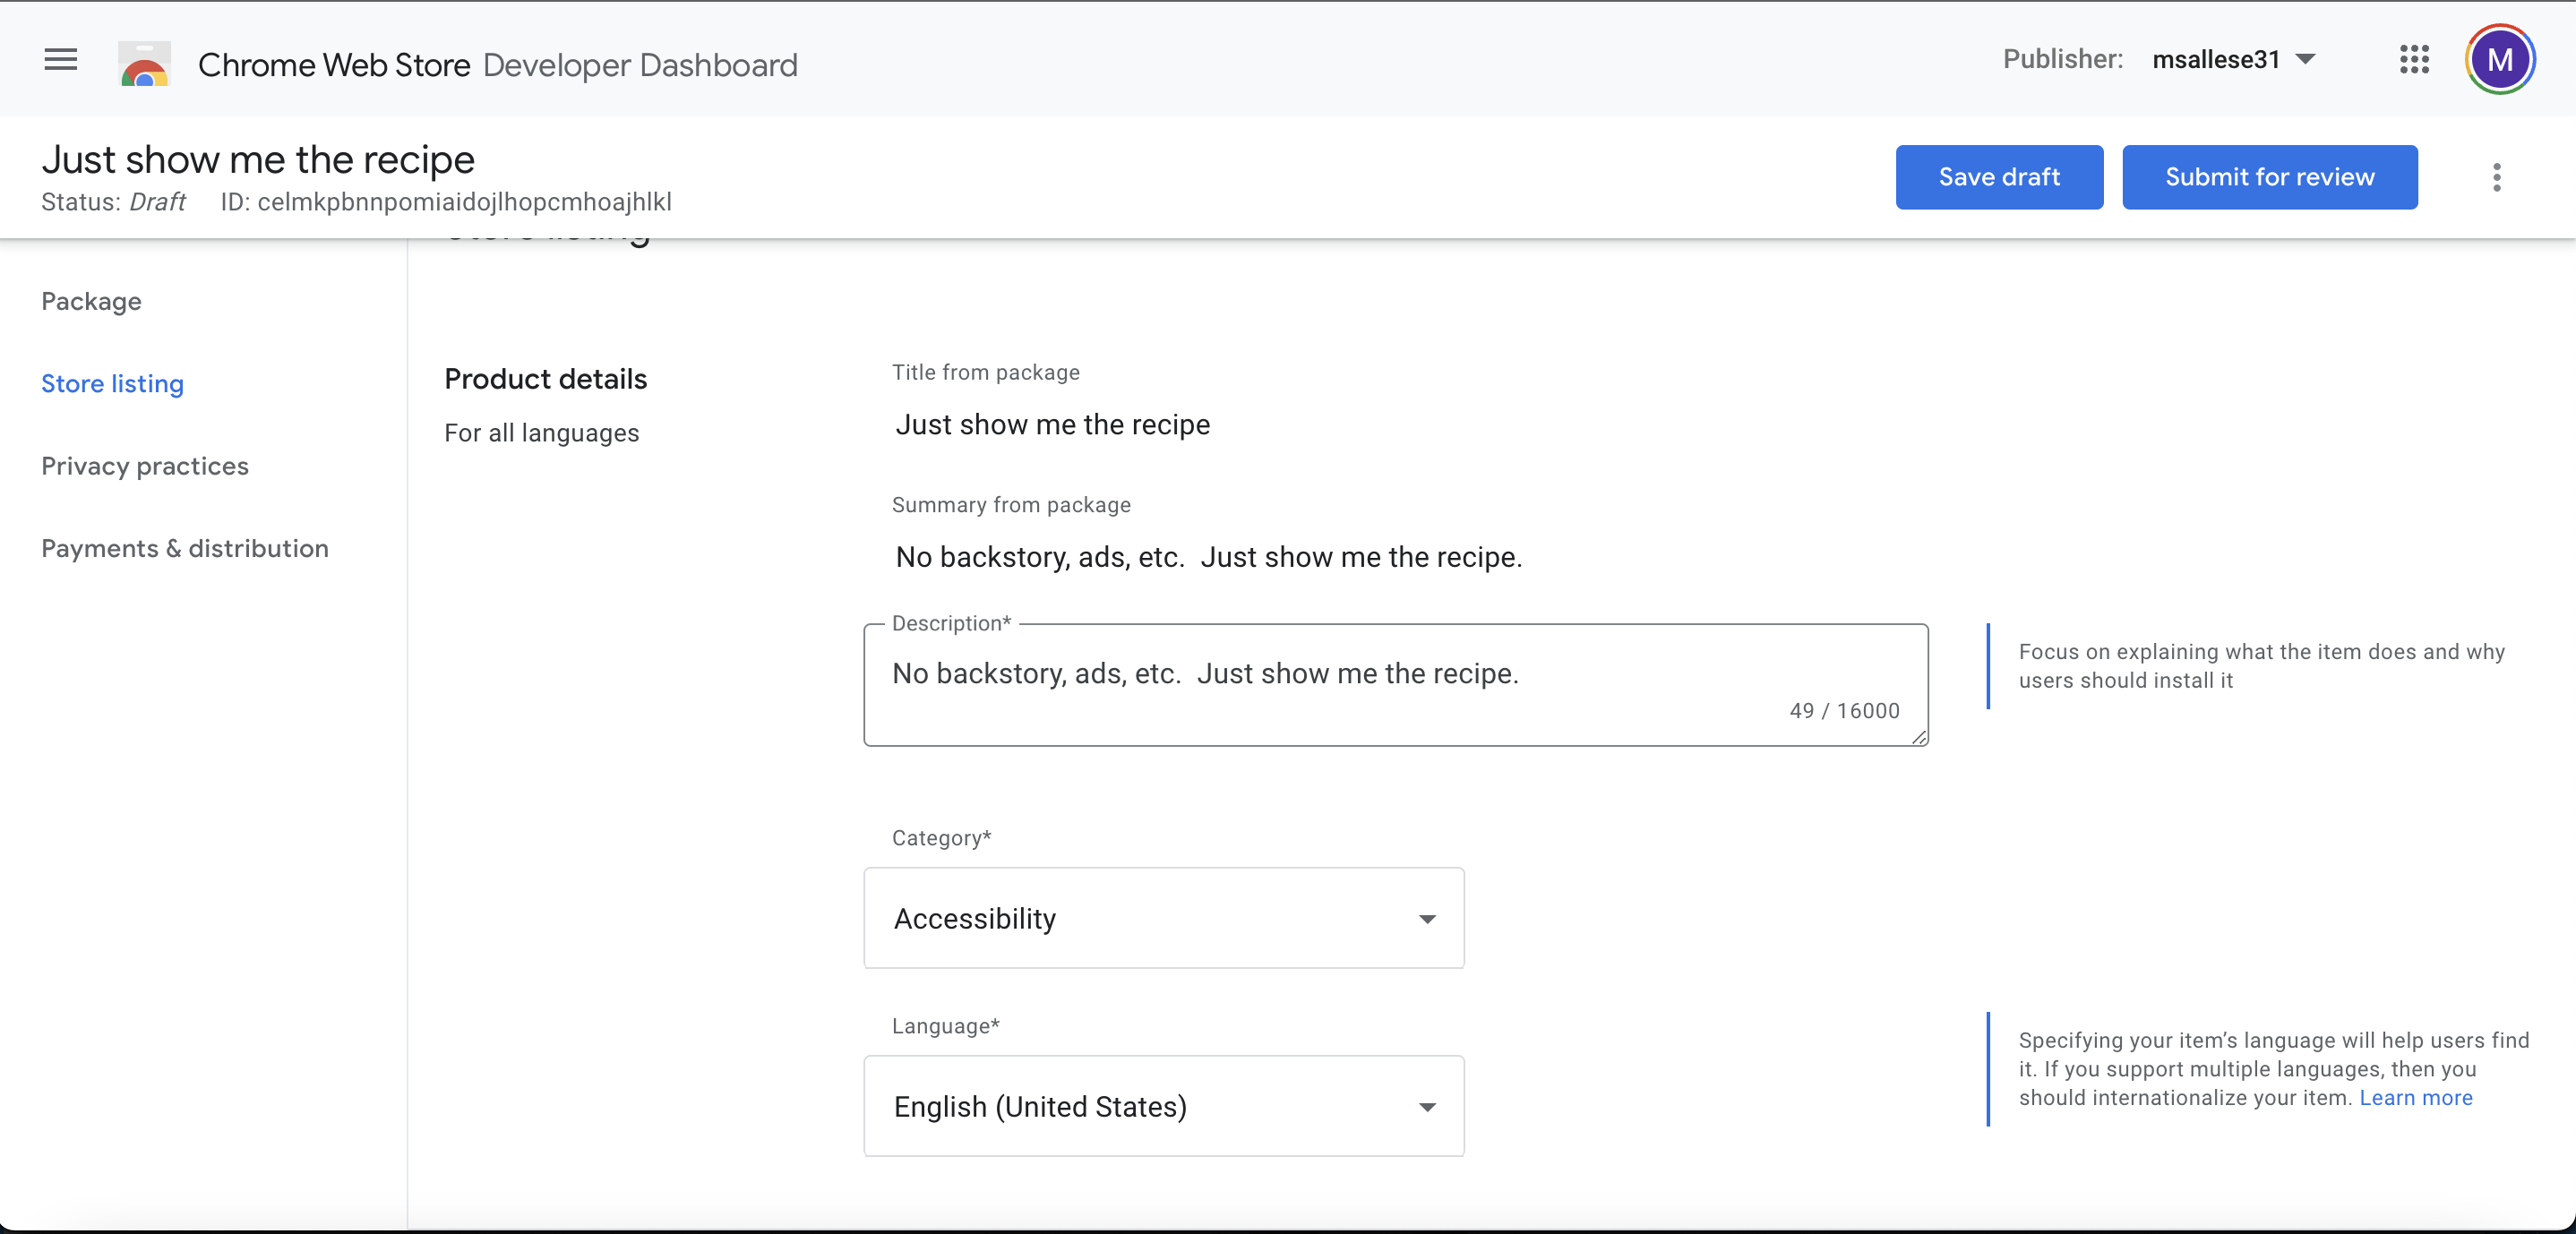
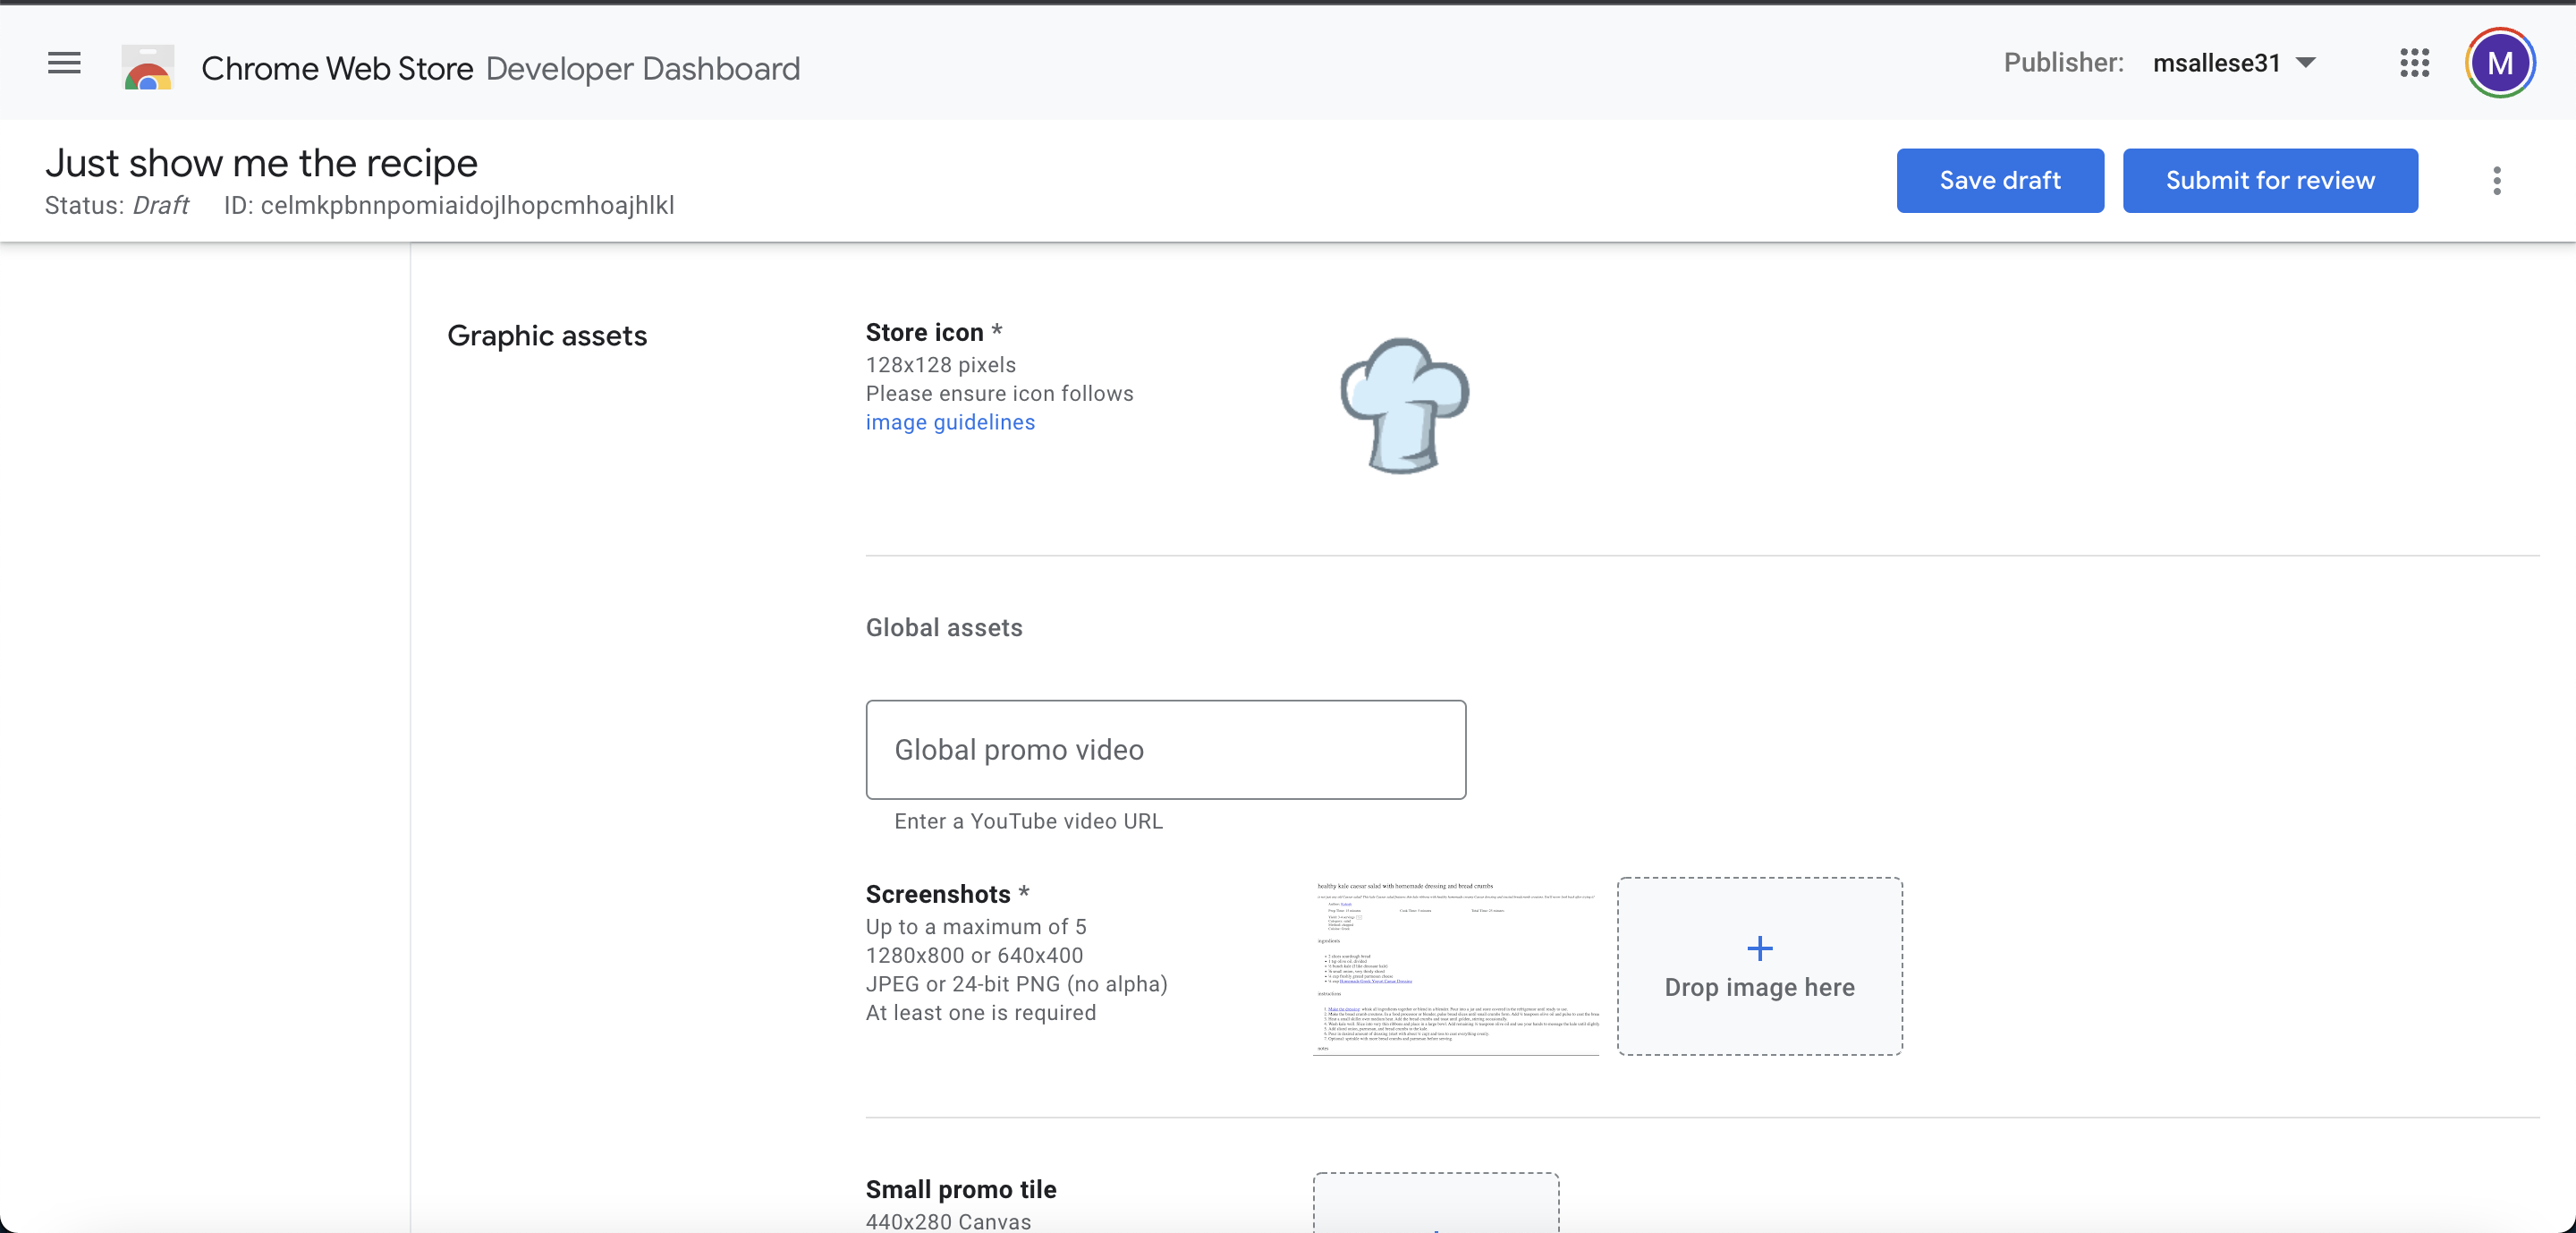
After you upload your zip, you’ll have a few more things to fill out. Fill out all the required fields on the “Store Listing” tab:
Also make sure to fill out the information that’s required on the “Privacy Practices” tab:
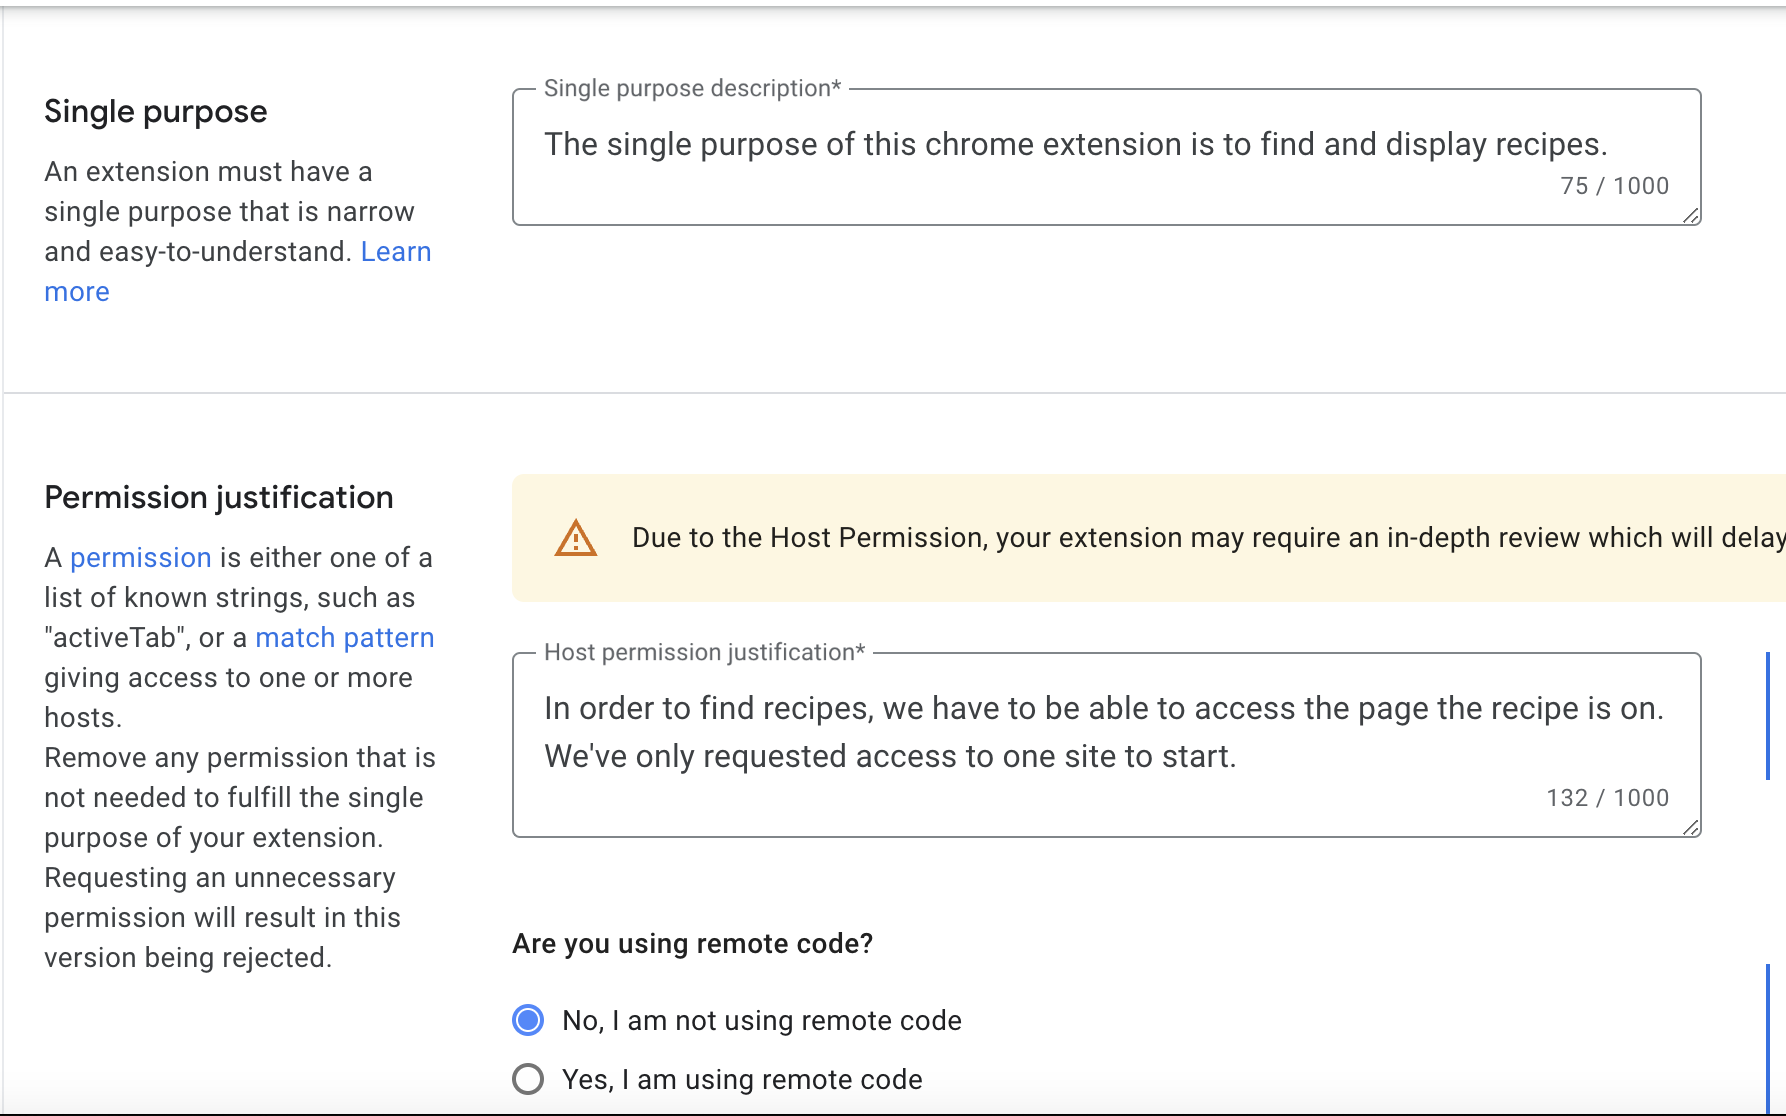
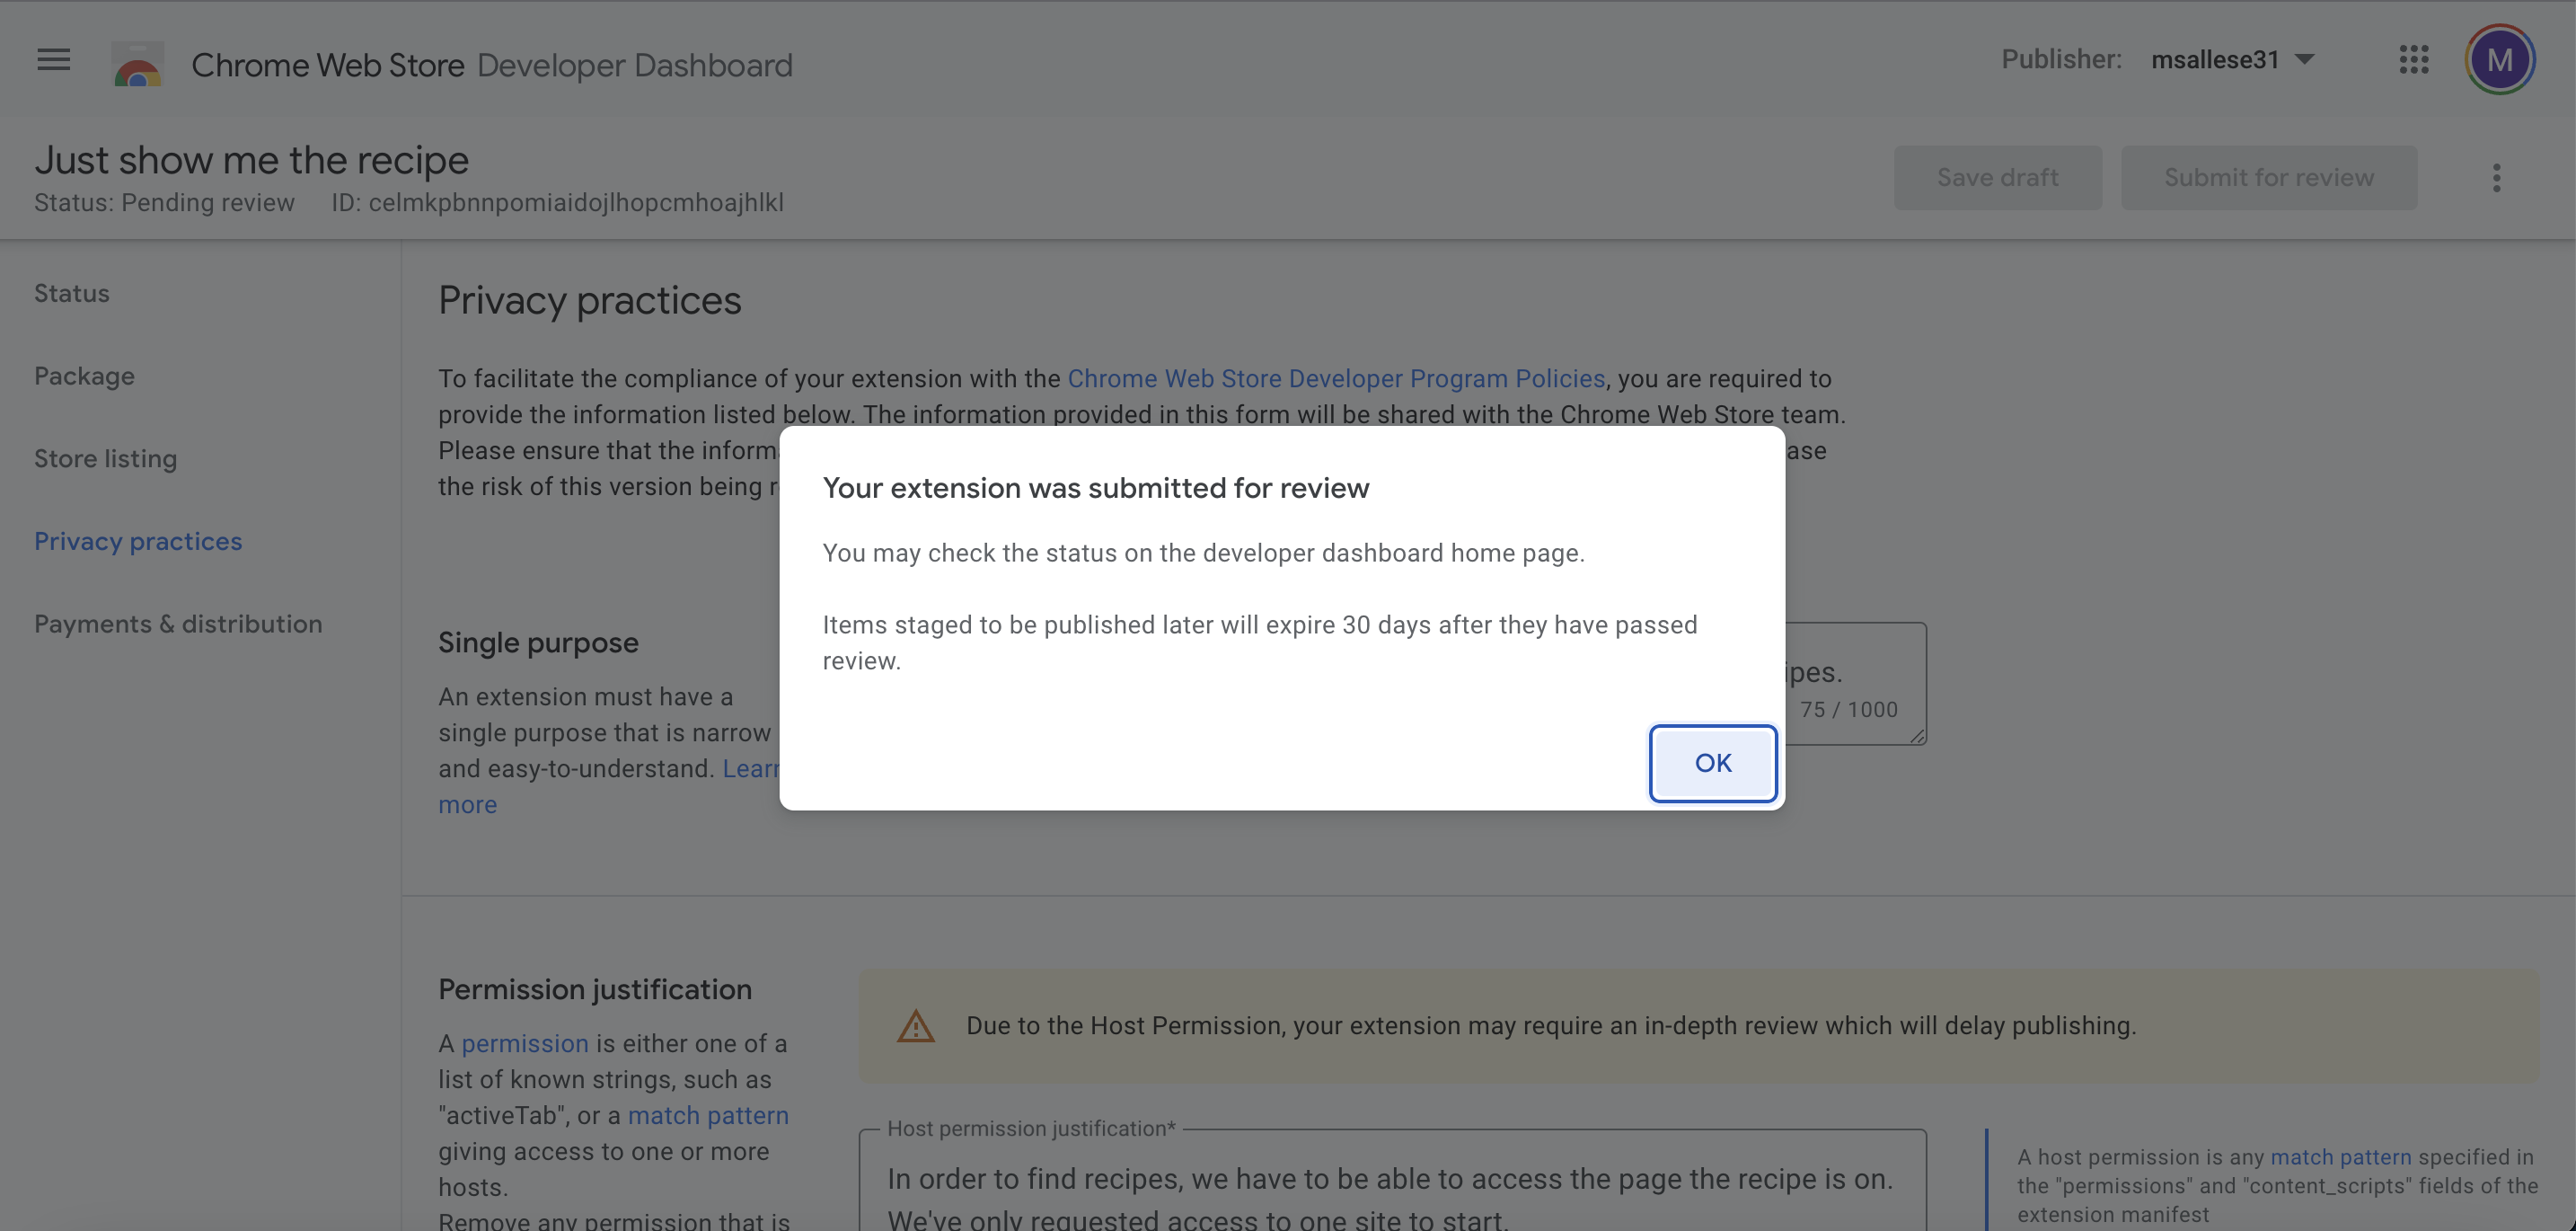
Once all the required information is there, you’ll be ready to submit your chrome extension for review. If the submit button isn’t enabled, the “Why can’t I submit” button is really helpful:

After you click the submit button, you’ll get a dialog telling you that your extension was submitted for review:
In my experience, the first extension you submit can take anywhere from a few days to a few weeks to get accepted. A big factor in how long it takes the chrome store to review your extension is how many sensitive permissions you’ve requested. For example if you’ve requested that your content script be run on every website, the chrome store is going to be looking for a pretty good justification for that.
Congratulations!
Congrats! You’ve just submitted your first chrome extension to the chrome store. Remember, you can get all the source code from this post here: https://github.com/msallese31/just-show-me-the-recipe
If this post was useful, let me know! You can find me on twitter .
If you’d like me to build a chrome extension for you or help out with one, feel free to reach out!
Update: My extension got rejected!
After submitting my extension to the chrome store, I received a notification that it was rejected. Here is the message I received:
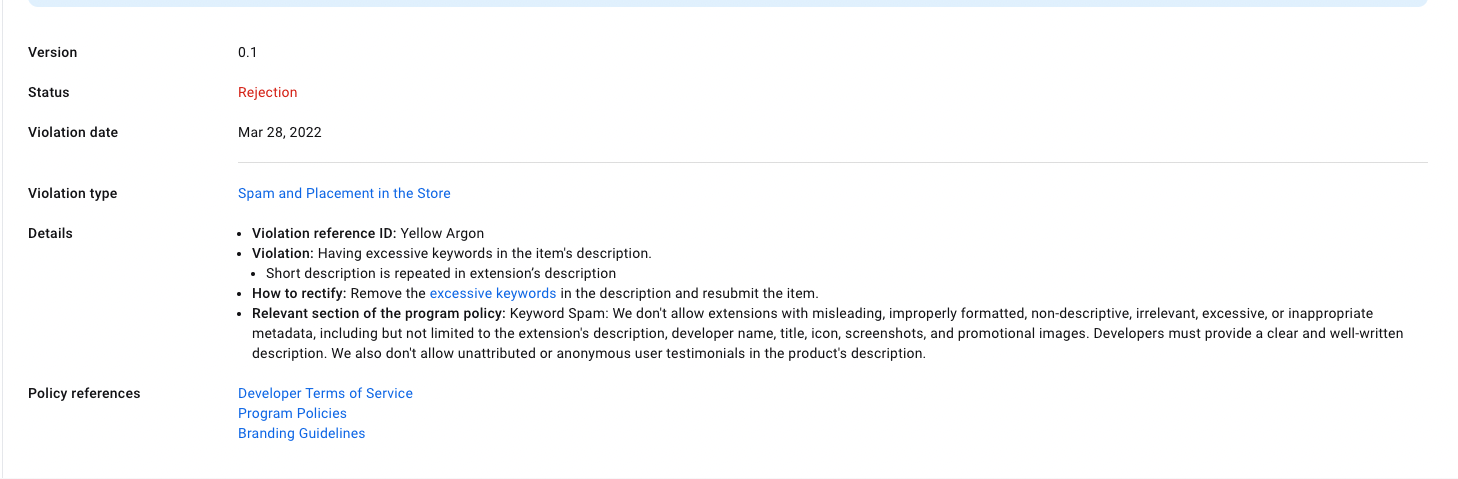
The important part:
Violation reference ID: Yellow Argon
Violation: Having excessive keywords in the item’s description.
Short description is repeated in extension’s description
The chrome store flagged me for excessive keywords. Turns out they didn’t like that my description I provided for the store listing was the same as the description I had in my manifest. I provided a new description to the chrome store, submitted it for review, and successfully published my extension!
Thanks for reading =)